
Step-by-Step Guide to Replacing Plumbing Connectors
To replace plumbing connectors, start by identifying the right type and size for your pipes. Gather necessary tools like wrenches, pipe cutters, and Teflon tape. Prepare your work area by turning off the water supply and covering the floor. Remove old connectors carefully, cleaning pipe threads thoroughly. Install new connectors by applying plumber's tape and hand-tightening before using a wrench for the final quarter turn. Test for leaks by slowly turning on the water supply and checking connections. Troubleshoot any issues by tightening connections or investigating potential blockages. Following these steps will help guarantee a successful repair and prevent future problems.
Identifying the Right Plumbing Connectors
Examine your plumbing system closely to identify the correct connectors you'll need. Start by determining the type of pipes you're working with, such as copper, PVC, or galvanized steel. This will narrow down your connector options drastically. Next, focus on measuring connector size accurately. Use a tape measure or caliper to determine the diameter of your pipes and existing connectors. Don't forget to measure the length of the connector as well, guaranteeing a proper fit.
When comparing connector materials, consider factors like durability, corrosion resistance, and compatibility with your existing plumbing. Brass connectors are versatile and long-lasting, while plastic options are more affordable but may not be suitable for all applications. Stainless steel connectors offer excellent corrosion resistance but come at a higher price point. Pay attention to the specific requirements of your plumbing system, such as pressure ratings and temperature tolerances. If you're unsure, consult a plumbing professional or refer to local building codes. By carefully identifying the right plumbing connectors, you'll secure a secure and leak-free connection, saving time and preventing future headaches.
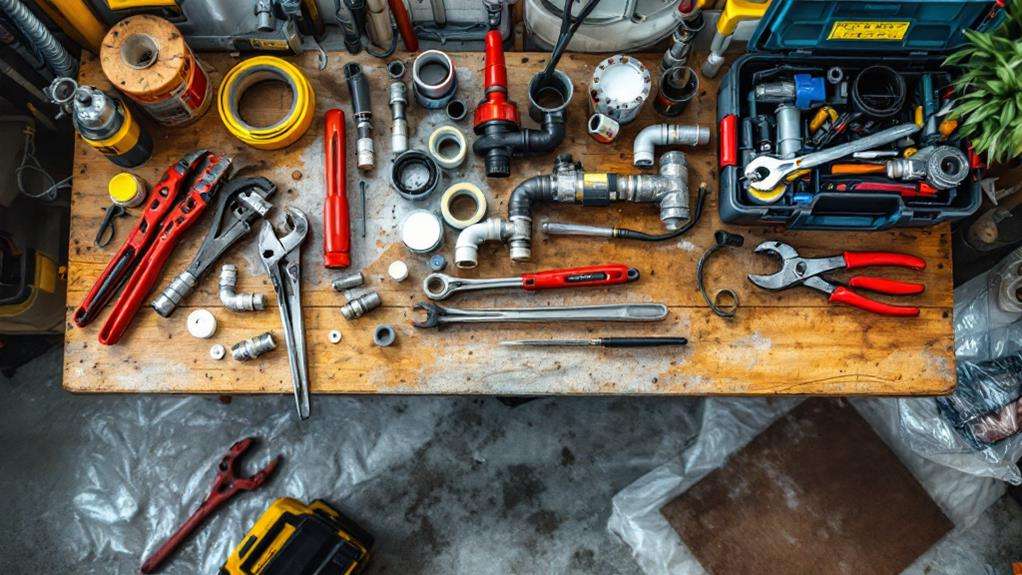
Necessary Tools and Materials
Before you begin replacing plumbing connectors, it's crucial to gather all the necessary tools and materials. You'll need adjustable wrenches, pipe cutters, pliers, and a hacksaw. Don't forget to include Teflon tape, plumber's putty, and a wire brush for cleaning pipe threads. When purchasing plumbing parts, make certain you have the correct size and type of connectors for your specific job.
Essential materials include replacement connectors, pipe sections, and any required adapters. It's wise to buy extra connectors and pipes in case of unexpected issues or mistakes. You'll also need safety equipment like work gloves and safety glasses.
For larger jobs, consider renting specialized tools like pipe threaders or soldering equipment. When storing plumbing equipment, keep everything organized in a toolbox or dedicated storage area to prevent loss or damage. Label your tools and materials for easy identification during future projects.
Before starting, double-check that you have everything you need. This preparation will save you time and frustration, preventing multiple trips to the hardware store mid-project. With the right tools and materials on hand, you'll be ready to tackle your plumbing connector replacement efficiently and effectively.
Preparing the Work Area
In preparation for replacing plumbing connectors, you'll need to set up a proper work area. Start by organizing your work area, guaranteeing you have enough space to move around comfortably. Clear the area of any unnecessary items and lay out your tools and materials within easy reach.
Protecting nearby surfaces is indispensable to prevent damage during the replacement process. Cover the floor with a drop cloth or old towels to catch any water spills or debris. If you're working in a cabinet, remove items and line the bottom with plastic sheeting.
Next, follow these steps to complete your work area preparation:
- Turn off the water supply to the affected area and open faucets to drain remaining water
- Place a bucket under the work area to catch any residual water
- Set up adequate lighting to allow you to see clearly while working
- Ventilate the area by opening windows or using a fan to disperse any fumes from cleaning products or adhesives
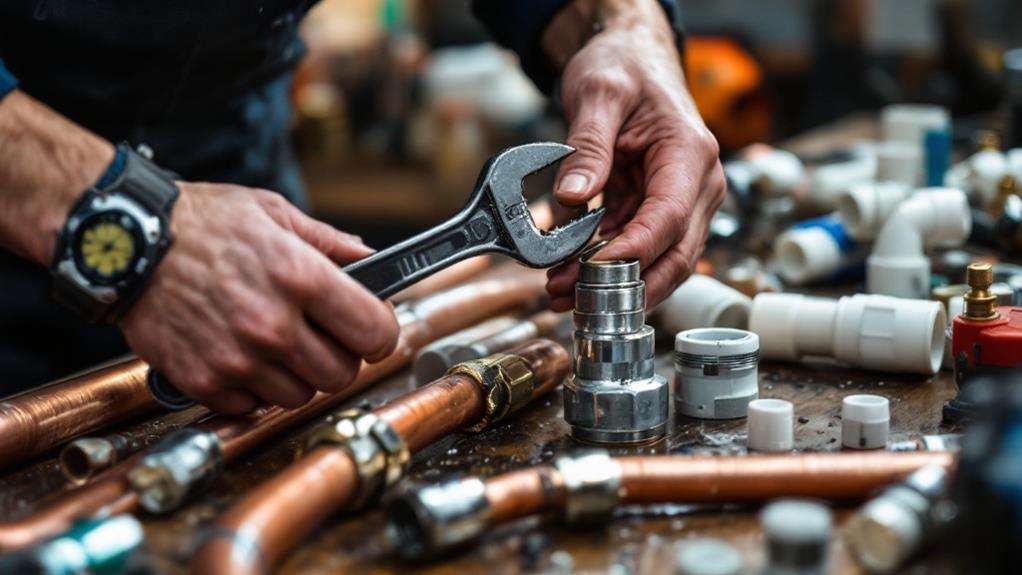
Removing Old Connectors
With your work area prepared, it's time to tackle the old connectors. Start by shutting off the main water supply to minimize water damage during the removal process. Next, open nearby faucets to release any remaining pressure in the pipes.
Before disconnecting the old connectors, place a bucket or towels beneath them to catch any residual water. Use an adjustable wrench or pliers to loosen the nuts securing the connectors to the pipes. Turn counterclockwise slowly to prevent damaging the pipes or fittings. If the connectors are stubborn, apply a penetrating oil and let it sit for a few minutes before trying again.
As you remove each connector, be prepared for some water to leak out. Hold the pipe steady with one hand while unscrewing the connector with the other to avoid unnecessary strain on the plumbing system. Once loose, carefully detach the old connector and set it aside. Inspect the pipe ends for any damage or corrosion that might impact the new installation. Clean the pipe threads thoroughly with a wire brush to facilitate a proper seal with the new connectors. Finally, dry the area completely before proceeding to the next step.
Installing New Plumbing Connectors
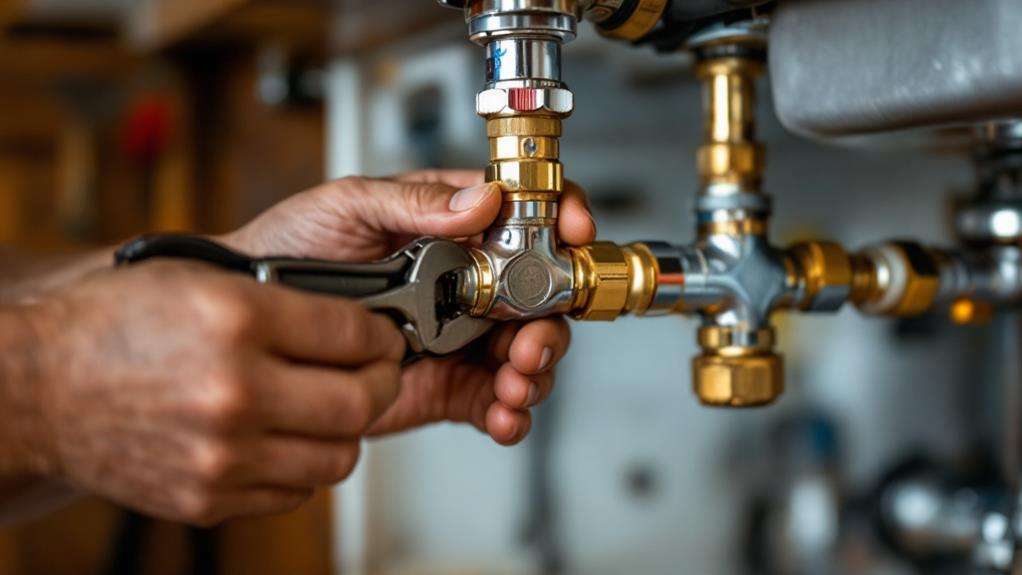
Readiness is key when installing new plumbing connectors. Before you begin, make sure you have all the necessary tools and materials at hand. This includes the new connectors, plumber's tape, and an adjustable wrench. Proper sealing techniques are indispensable for preventing water leaks, so pay close attention to this step.
To install new plumbing connectors:
- Apply plumber's tape to the threaded ends of the pipes, wrapping it clockwise to guarantee a tight seal.
- Position the new connector carefully, aligning it with the pipe threads.
- Hand-tighten the connector to avoid cross-threading.
- Use your adjustable wrench to give the connector an additional quarter turn, being careful not to over-tighten.
After installation, it is imperative to check for any potential leaks. Turn on the water supply and closely inspect the newly installed connectors. If you notice any drips or moisture, tighten the connections slightly. Remember, preventing water leaks is critical to avoid costly damage and maintain the integrity of your plumbing system. If you're unsure about your ability to properly install the connectors, don't hesitate to consult a professional plumber.
Testing and Troubleshooting
After completing the installation of new plumbing connectors, it's critical to test and troubleshoot your work. Start by turning on the water supply slowly and observe the connections carefully. You're looking for any signs of leaks or drips. Check all joints, fittings, and connectors for moisture.
If you notice any leaks, turn off the water immediately and tighten the connections. Be careful not to overtighten, as this can damage the fittings. Once you've addressed any visible leaks, run water through the system at full pressure to verify proper connections and function.
Listen for any unusual noises, such as whistling or banging, which could indicate air in the lines or loose fittings. If you hear these sounds, you'll need to bleed the lines or double-check your connections.
Next, test all fixtures connected to the new plumbing. Run faucets, flush toilets, and operate any appliances to verify proper water flow and drainage. If you encounter issues like low water pressure or slow drainage, you may need to investigate further for potential blockages or incorrectly sized connectors.