
How to Use Quick-Connect Plumbing Fittings for Easy DIY Repairs
Quick-connect plumbing fittings make DIY repairs a breeze. Start by gathering the right tools: a tubing cutter, deburring tool, and measuring tape. Choose fittings compatible with your pipe type and size. To install, measure and cut the pipe, clean the ends, and mark the insertion depth. Align the pipe and push it into the fitting until you feel it click. Check for proper gasket placement and a secure connection. For maintenance, regularly inspect fittings and perform leak checks. When troubleshooting, identify leak sources and use the manufacturer's release tool to disconnect fittings safely. With these basics, you're on your way to conquering quick-connect plumbing repairs.
Understanding Quick-Connect Plumbing Fittings
With quick-connect plumbing fittings, you can simplify many DIY plumbing repairs and installations. These innovative fittings allow you to connect pipes and components without soldering, threading, or using special tools. They're designed for ease of use, making them ideal for homeowners who want to tackle plumbing projects themselves.
Quick-connect fittings consist of several parts working together to create a secure, watertight seal. The main components include a plastic or metal body, a collet (a grip ring that holds the pipe in place), and an O-ring for sealing. The fitting composition varies depending on the manufacturer and intended use, but most are made from durable materials like brass, copper, or high-grade plastic.
When choosing quick-connect fittings, consider the fitting materials carefully. Brass and copper fittings are often used for hot water lines and offer excellent durability, while plastic fittings are more affordable and resist corrosion. Some fittings are designed for specific pipe types, such as PEX, copper, or CPVC, so guarantee you select the right one for your plumbing system. By understanding the components and materials of quick-connect fittings, you'll be better equipped to use them effectively in your DIY plumbing projects.
Tools and Materials Needed
For quick-connect plumbing repairs, you'll need a few essential tools and materials. The beauty of quick-connect fittings lies in their simplicity, requiring only a handful of easy to use tools for most jobs.
First, you'll need a tubing cutter or a sharp utility knife to create clean, straight cuts on your pipes. A deburring tool is also pivotal to smooth the cut edges, ensuring a proper seal. Don't forget to grab a measuring tape for accurate pipe measurements.
As for necessary materials, stock up on various quick-connect fittings appropriate for your project, such as straight couplings, elbows, and tees. You'll also need pipe lengths in the correct material and diameter for your plumbing system.
Keep some pipe lubricant on hand to ease connections and prevent leaks. Teflon tape isn't typically required for quick-connect fittings, but it's good to have just in case. For added security, consider using locking clips designed for quick-connect systems.
Lastly, always have a bucket and towels nearby to catch any water during repairs. With these tools and materials, you'll be well-equipped to tackle most quick-connect plumbing projects efficiently and effectively.
Common Types of Fittings
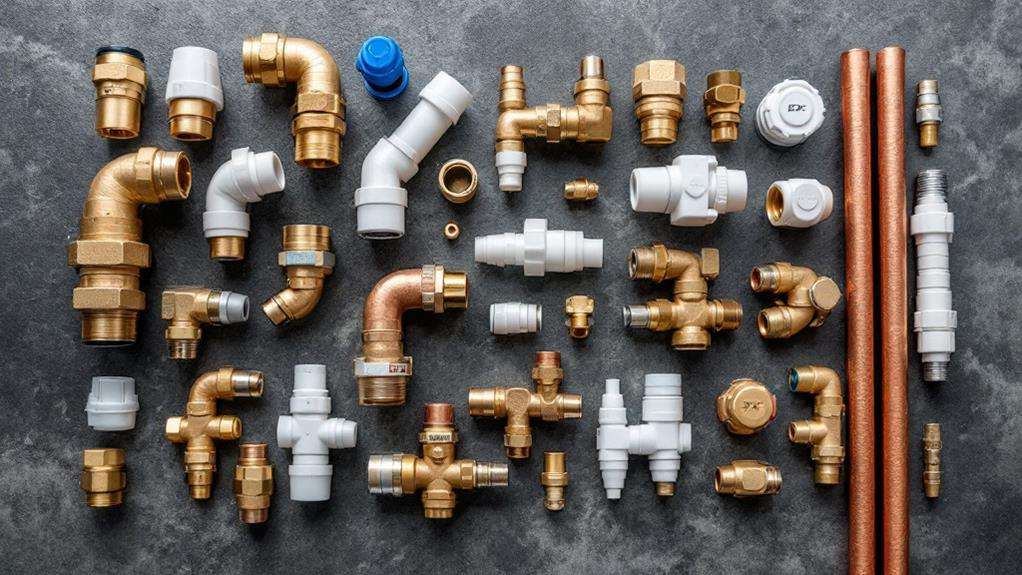
Now that you're equipped with the right tools and materials, let's investigate the common types of quick-connect fittings you'll encounter in your DIY plumbing projects. The most frequently used fittings include straight couplings, elbows, tees, and adapters. Straight couplings join two pipes of the same diameter, while elbows create 90-degree or 45-degree turns in your plumbing system. Tees allow you to branch off in three directions, and adapters help connect pipes of different sizes or materials.
When selecting fittings, you'll need to consider pipe diameter measurements carefully. Quick-connect fittings are available in various sizes, typically ranging from 3/8 inch to 1 inch for residential use. It's imperative to match the fitting size to your existing pipes for a secure connection. Additionally, pay attention to chemical compatibility concerns. Different materials, such as PEX, copper, and CPVC, may require specific types of fittings to confirm proper sealing and longevity. Always check the manufacturer's recommendations and local plumbing codes to guarantee you're using the right fittings for your particular application. By familiarizing yourself with these common types of quick-connect fittings, you'll be better prepared to tackle your plumbing repairs efficiently and effectively.
Step-by-Step Installation Process
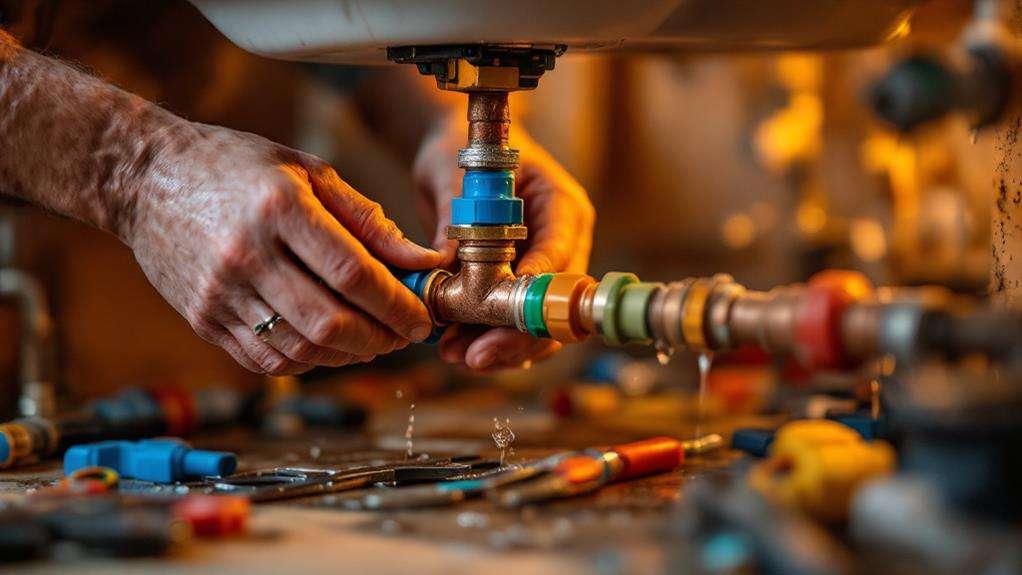
The step-by-step installation process for quick-connect plumbing fittings is straightforward and can be completed in just a few minutes. To guarantee a successful installation, follow these key steps:
- Measure and cut your pipe to the correct length
- Clean the pipe ends thoroughly
- Mark the insertion depth on the pipe
- Ensure proper pipe alignment before connecting
- Check for correct gasket placement inside the fitting
Begin by measuring and cutting your pipe to the required length, allowing for the insertion depth of the fitting. Clean the pipe ends to remove any debris or burrs that could damage the gasket. Mark the insertion depth on the pipe using a permanent marker or tape to ensure you've fully inserted it into the fitting.
Next, align the pipe carefully with the fitting, ensuring it's straight and level. This proper pipe alignment is indispensable for a leak-free connection. Slide the pipe into the fitting until you reach the marked insertion depth. You'll feel resistance as the pipe passes through the gasket and locking mechanism.
Troubleshooting Common Issues
While quick-connect fittings are designed for ease of use, you might encounter some issues during installation or after completing your project. Let's address some common problems and their solutions.
If you notice water leaking from a connection, start by identifying leak sources. Check if the pipe is fully inserted into the fitting. Sometimes, debris or burrs on the pipe's end can prevent a proper seal. Clean the pipe end and reinsert it firmly. If the leak persists, inspect the O-ring inside the fitting for damage or misalignment. Replace the O-ring if necessary.
Addressing corrosion problems is vital for long-term success. If you spot corrosion on metal components, it could indicate incompatible materials or exposure to harsh chemicals. Confirm you're using fittings appropriate for your plumbing system and water composition. In areas prone to corrosion, consider using corrosion-resistant fittings or applying a protective coating.
If you're having trouble disconnecting a fitting, don't force it. Use the manufacturer's recommended release tool to avoid damaging the connection. For stubborn fittings, apply a penetrating lubricant and wait before trying again. Remember, patience is key when troubleshooting to prevent further complications.
Maintenance and Best Practices
Proper maintenance of quick-connect plumbing fittings is essential for ensuring their longevity and performance. To keep your fittings in top shape, regularly inspect them for signs of wear or damage. Perform leak detection checks every few months by examining the connections for moisture or drips. If you notice any issues, address them promptly to prevent further damage.
Water pressure management is pivotal for the longevity of your quick-connect fittings. Excessive pressure can strain the connections and lead to premature failure. Install a pressure regulator if your home's water pressure exceeds 80 psi.
Periodic cleaning of fittings with mild soap and water is advised. Avoid using harsh chemicals or abrasive materials. Replace O-rings and seals as needed. Keep spare fittings on hand for emergency repairs. Use appropriate tools when working with quick-connect fittings.
When disconnecting fittings, always use the manufacturer-recommended release tool to avoid damaging the connection. If you're unsure about a fitting's condition, it's better to replace it than risk a leak. By following these maintenance tips and best practices, you'll extend the life of your quick-connect plumbing fittings and minimize the risk of leaks or failures.