
How to Install Plumbing Fittings and Connectors Like a Pro
To install plumbing fittings and connectors like a pro, you'll need the right tools and knowledge. Start by selecting appropriate fittings for your pipes and gathering essential tools like wrenches, cutters, and sealants. Properly prepare pipe ends by cleaning, deburring, and marking insertion depths. Follow a step-by-step process for installation, including dry-fitting, applying sealants, and tightening connections. Guarantee watertight seals by using plumber's tape or pipe dope correctly and performing pressure tests. If issues arise, troubleshoot by checking for leaks, misalignments, or loose connections. With practice and acumen, you'll soon be tackling plumbing projects with professional-level aptitude.
Types of Plumbing Fittings
When diving into plumbing projects, you'll encounter various types of fittings and connectors. Understanding these components is vital for successful installations. Copper pipe fittings are common in many homes and include elbows, tees, couplings, and adapters. These fittings allow you to change direction, split flows, or join pipes of different sizes. For copper pipes, you'll typically use solder fittings or push-fit connectors.
Plastic pipe connections are another essential category, primarily used with PVC, PEX, and ABS pipes. These include slip fittings, threaded fittings, and compression fittings. Slip fittings are joined using solvent cement, while threaded fittings screw together. Compression fittings use a compression nut and ring to create a watertight seal.
Other important types include brass fittings, which are durable and resistant to corrosion, and galvanized steel fittings for use with steel pipes. You'll also come across union fittings, which allow for easy disassembly, and reducer fittings for connecting pipes of different diameters. Familiarizing yourself with these various fittings will help you choose the right components for your specific plumbing needs and guarantee a leak-free installation.
Essential Tools for Installation
Now that you're familiar with the various plumbing fittings, it's time to gather the right tools for installation. You'll need a combination of hand tools and specialized plumbing equipment to get the job done efficiently and safely.
Start with the basics: adjustable wrenches, pipe wrenches, and channel-lock pliers. These will help you grip and turn fittings securely. Don't forget a hacksaw or pipe cutter for trimming pipes to size. A tape measure and level are indispensable for accurate measurements and proper alignment.
For soldering copper pipes, you'll need a propane torch, flux, solder, and a wire brush. If you're working with PVC, grab PVC primer, cement, and a applicator brush. A basin wrench is essential for reaching tight spaces under sinks.
Remember, proper tool maintenance is key to longevity and performance. Keep your tools clean, dry, and organized. Sharpen blades regularly and oil moving parts to prevent rust.
Don't overlook appropriate safety gear. Wear safety glasses, work gloves, and knee pads to protect yourself from potential injuries. When working with chemicals or heat, use a respirator mask to avoid inhaling harmful fumes.
Preparing Pipes for Fitting
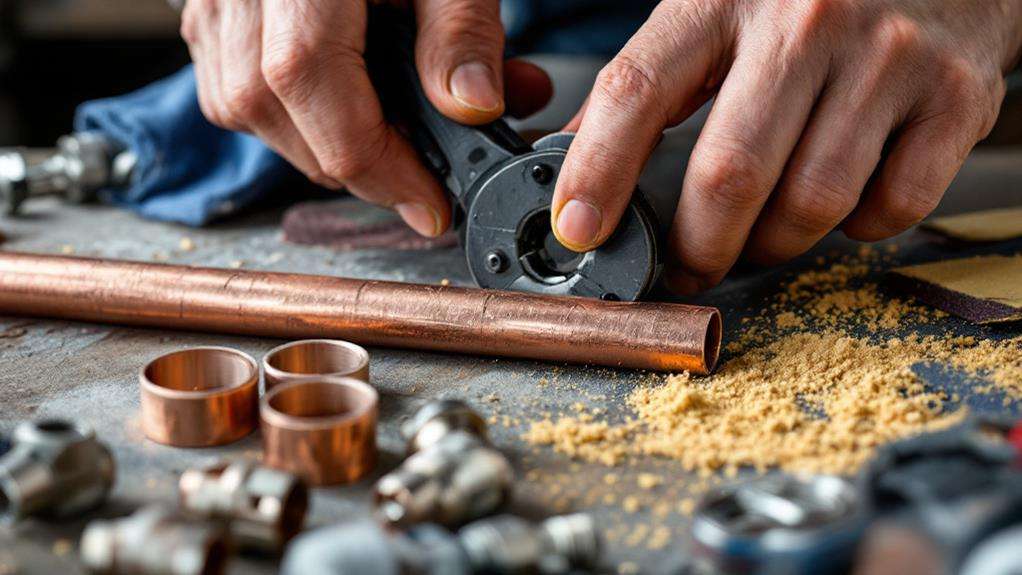
Prior to installing any fittings, you'll need to properly prepare your pipes. This essential step guarantees a secure and leak-free connection. Start by thoroughly cleaning the pipe ends using appropriate pipe cleaning techniques. Remove any dirt, debris, or old sealant with a wire brush or sandpaper. For copper pipes, use emery cloth to create a smooth surface.
Next, measure and mark the insertion depth on the pipe. This helps you make certain the fitting is fully seated during installation. If you're working with PVC pipes, use a deburring tool to smooth the cut edges, preventing damage to the fitting's O-ring.
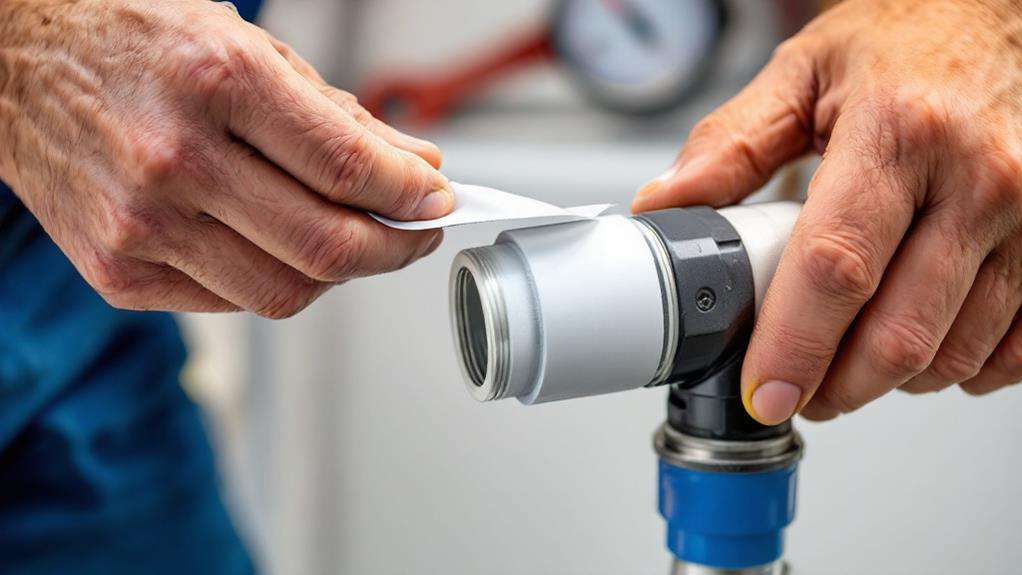
For threaded connections, apply pipe thread sealant or wrap Teflon tape around the male threads in a clockwise direction. This creates a watertight seal and prevents leaks. When using compression fittings, slide the nut and ferrule onto the pipe before inserting it into the fitting body.
One of the most important pipe preparation methods is ensuring the pipe is cut square. Use a pipe cutter for clean, straight cuts on metal pipes, and a plastic pipe cutter for PVC. A miter box can help achieve precise cuts for both materials. Remember, proper preparation is key to successful plumbing installations.
Step-by-Step Installation Process
With the pipes properly prepared, you're ready to begin the step-by-step installation process. First, guarantee proper pipe alignment by dry-fitting the components together. This allows you to make any necessary adjustments before applying adhesive or sealant.
Next, apply pipe joint compound or Teflon tape to threaded connections, which helps in minimizing leaks. For PVC pipes, use an appropriate primer and cement. When joining copper pipes, apply flux to the fitting and pipe before soldering.
Now, assemble the fittings and connectors, starting from the furthest point and working your way back to the main supply line. Tighten threaded connections firmly, but avoid over-tightening, which can damage the fittings. For soldered joints, heat the fitting evenly and apply solder to create a watertight seal.
After completing all connections, allow sufficient time for adhesives or solder to set before testing the system. Once cured, turn on the water supply and check for leaks. If you notice any drips or moisture, address them immediately by tightening connections or resealing joints as needed.
Remember to follow local plumbing codes and manufacturer instructions throughout the installation process to confirm a safe and compliant system.
Ensuring a Watertight Seal
Creating a watertight seal is essential for preventing leaks and guaranteeing the longevity of your plumbing system. To achieve this, you'll need to focus on proper tape application and correct pipe preparation. Start by cleaning the pipe threads thoroughly, removing any dirt, debris, or old tape residue. Use a wire brush to scrub the threads, assuring a clean surface for the new seal.
When applying plumber's tape, wrap it clockwise around the male threads, starting at the second thread from the end. Make sure to stretch the tape slightly as you wrap it, creating a tight seal. Overlap each layer by about 50% and use 3-4 wraps for most applications. Don't overdo it, as excess tape can interfere with the connection.
For threaded connections without tape, use pipe dope or thread sealant. Apply a thin, even layer to the male threads, covering all grooves. When tightening fittings, use the appropriate tools and avoid over-tightening, which can damage the threads or crack the fitting. For compression fittings, ensure the ferrule is correctly positioned and tighten the nut securely. Always double-check your work and perform a pressure test to substantiate the seal's integrity before completing the installation.
Troubleshooting Common Installation Issues
Even with careful preparation and proper sealing techniques, you might encounter issues during plumbing installation. Common problems include persistent leaks, misaligned pipes, and loose connections. To address these challenges, you'll need to develop your troubleshooting skills.
Start by conducting a thorough leak detection process. Turn on the water supply and carefully inspect all connections for signs of moisture. If you spot a leak, tighten the fitting or apply additional sealant as needed. For stubborn leaks, you may need to disassemble the connection and start over.
Pipe alignment issues can cause stress on joints and lead to future leaks. Guarantee that your pipes are properly supported and aligned before making final connections. Use a level to check for correct positioning, and adjust as necessary.
If you're dealing with loose connections, double-check that you've used the correct size fittings and that they're properly seated. Sometimes, simply tightening the connection with the appropriate tool can resolve the issue. However, if the problem persists, you may need to replace the fitting or reassess your installation method.