How to Install and Use a Sewage Ejector Pump in Your Basement
To install a sewage ejector pump in your basement, start by choosing an ideal location with proper ventilation. You'll need essential tools like PVC pipes, fittings, and electrical components. Prepare the site by examining existing pipes and addressing floatation concerns. Connect the pipes and fittings, ensuring proper sealing. Install the ejector basin, level it securely, and set up the pump near the drain inlet. Make electrical connections using a dedicated GFCI-protected circuit. Test the pump's functionality and monitor its operation. Regular maintenance, including seasonal inspections and cleaning, is paramount for superior performance. The following steps will guide you through a successful installation process.
Understanding Sewage Ejector Pumps
What exactly is a sewage ejector pump, and why might you need one? A sewage ejector pump is a pivotal device that helps safely and efficiently remove wastewater from your home's basement. It works by pumping waste and water from lower areas to an elevated septic tank or main sewer line, preventing clogs and backups that could lead to costly repairs.
If your home has a gravity-based sewage system, you might think you don't need a pump. However, these pumps are indispensable for homes where the basement plumbing fixtures are located below the level of the main sewer line. They lift and transport wastewater, helping to prevent flooding and other issues in your basement.
Installing a sewage ejector pump requires some preparation and tools. You'll need personal protective equipment, Teflon tape, a shovel, a level, and a pipe wrench. Proper placement and leveling of the pump are pivotal for its effective operation. By ensuring it's securely installed in your basement, you'll maintain an efficient sewage system and avoid potential problems down the line. Remember, a well-functioning sewage ejector pump is key to keeping your basement dry and your home's plumbing in good shape.
Essential Tools and Equipment
Before you begin installing a sewage ejector pump, it is imperative to gather all the necessary tools and equipment. You'll need a sewage ejector pump, a basin, check valve, float switch, and discharge pipe. Don't forget to have PVC pipes, fittings, and cement on hand for connecting the system. You'll also require a vent pipe to prevent air pressure buildup when the pump is activated.
For electrical work, you must have wire strippers, electrical tape, and wire nuts. A power drill, hole saw, and reciprocating saw will be paramount for cutting through concrete and creating openings. You'll need a level to certify proper alignment and a wrench set for tightening connections.
Safety equipment is indispensable, so stock up on gloves, safety glasses, and a dust mask. Have a Power Source nearby, such as a GFCI outlet, to connect the pump. Keep a plumber's putty and silicone sealant handy for waterproofing.
Lastly, don't skimp on quality tools and equipment. Using subpar materials can lead to costly repairs and potential system failures down the line. Invest in reliable products to confirm a long-lasting and efficient sewage ejector pump installation.
Planning the Installation Location
The basement floor holds the key to a successful sewage ejector pump installation. When planning the installation location, you'll need to carefully evaluate your basement layout to determine the ideal spot for your pump. Start by identifying areas near drain inlets or slightly below the floor level, as these positions allow for effective wastewater removal.
While evaluating basement layout, consider the air circulation in potential installation areas. Proper ventilation helps reduce unpleasant odors from the sewage system. You'll also want to gauge moisture levels in different spots, avoiding areas prone to excessive dampness.
Next, examine your home's existing sewage system configuration to ensure the pump integrates seamlessly. Choose a location that's free from obstructions and debris, allowing for unimpeded pump operation. Clear and level the space around your chosen spot to comfortably accommodate the unit and its components.
When considering future expansions, select an area that won't interfere with potential basement renovations or additions. By carefully planning the installation location, you'll set the foundation for a well-functioning sewage ejector pump that efficiently removes wastewater from your home while minimizing odors and maintenance issues.
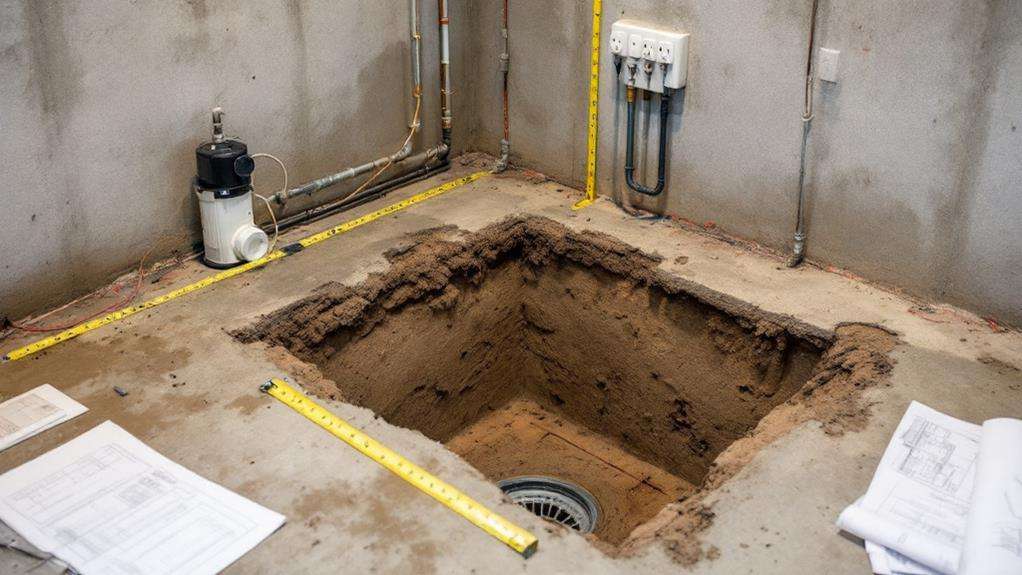
Preparing the Installation Site
Now that you've identified the ideal location for your sewage ejector pump, it's time to prepare the installation site. Begin by examining the existing pipes and determining their sizes to guarantee proper connections with your new system. This step is indispensable for a seamless integration.
Next, focus on identifying the basin's foundation and ensuring its stability. Dig a trench around the circumference of the basin to address floatation concerns. This trench serves a dual purpose: it prevents the basin from floating and provides a stable foundation. Add gravel to the trench to create a solid base for the basin to rest on.
Once the trench is prepared, carefully level the basin using weight and a shovel. This step is essential for proper installation and peak pump performance. Take your time to ensure the basin is perfectly level.
Connecting Pipes and Fittings
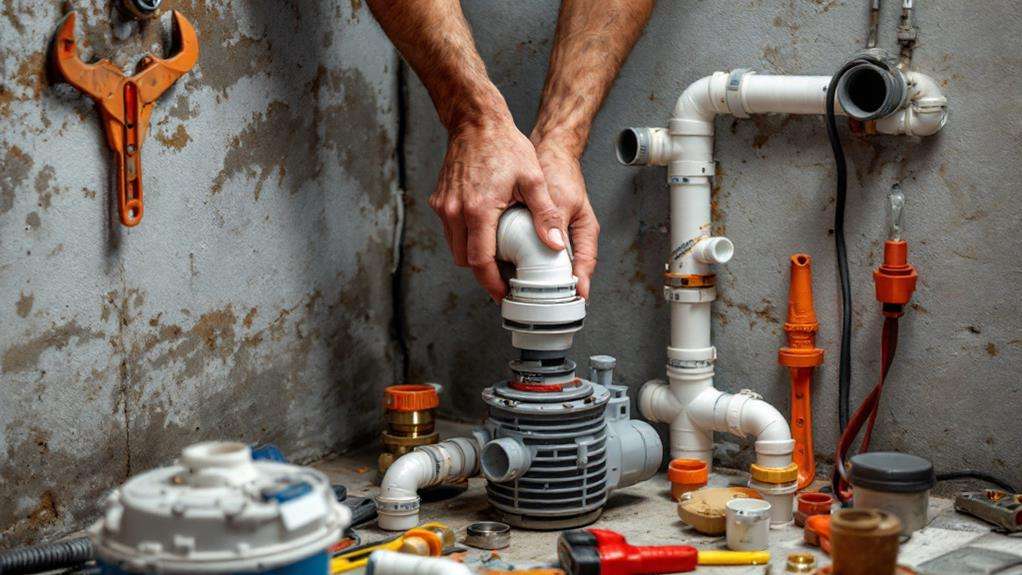
Plumbing connections form the lifeline of your sewage ejector pump system. When connecting pipes and fittings, it's vital to focus on selecting pipe materials, preventing backflow issues, and addressing drainage challenges. Start by connecting the outdoor sink using an inch and a half to two-inch no hub coupling. This guarantees proper flow and prevents potential clogs.
Next, you'll need to connect the floor drain and lavatory sink to the two-inch pipe. This step is essential for efficient drainage and helps avoid backflow problems. For the toilet, connect the three-inch pipe to the Y-fitting, which allows for proper waste management and prevents blockages.
To complete the main connections, glue the three-inch ABS pipe into the four-by-three bushing. This connects the system to the sewer ejector basin, addressing drainage challenges by ensuring a secure fit. Finally, secure the lid of the sewer ejector basin using the provided bolts, nuts, and washers. Don't forget to install the rope seal around the lid to prevent water leakage, which is crucial for maintaining a dry and sanitary environment in your basement.
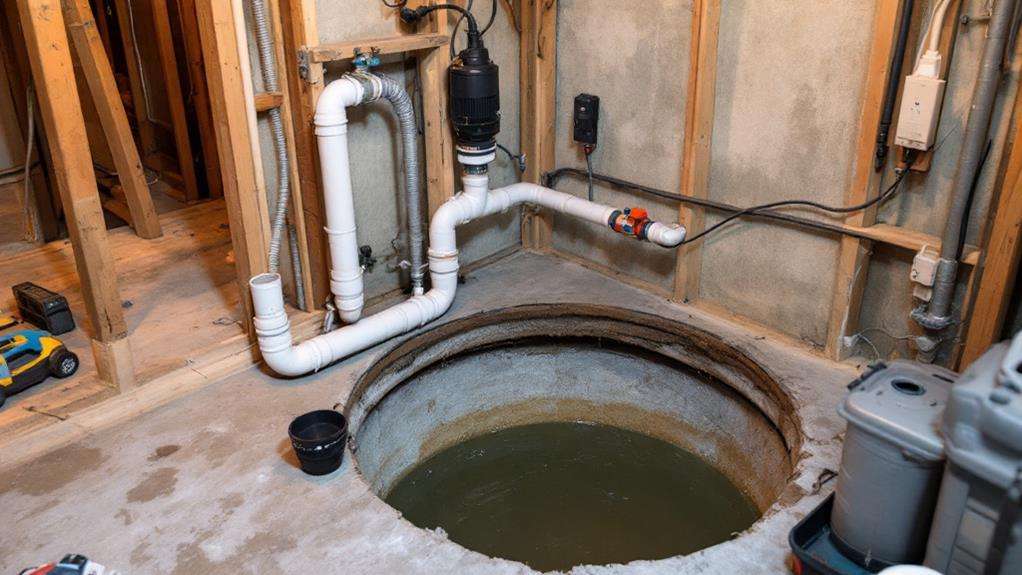
Installing the Ejector Basin
Installation of the ejector basin marks a pivotal phase in your sewage pump system setup. Begin by digging basin perimeter, creating a trench around the circumference. Fill this trench with gravel to prevent the basin from floating. Next, focus on leveling basin securely using a shovel. Guarantee it's firmly in place to provide a stable foundation for your system.
After positioning the basin, it's time to address the connections. Use a four-by-three bushing to join the three-inch pipe from your house to the basin. This step is indispensable for proper waste flow. To enhance the system's integrity, sealing basin connection is vital. Apply silicone around the connection points for extra security and to prevent any water leakage.
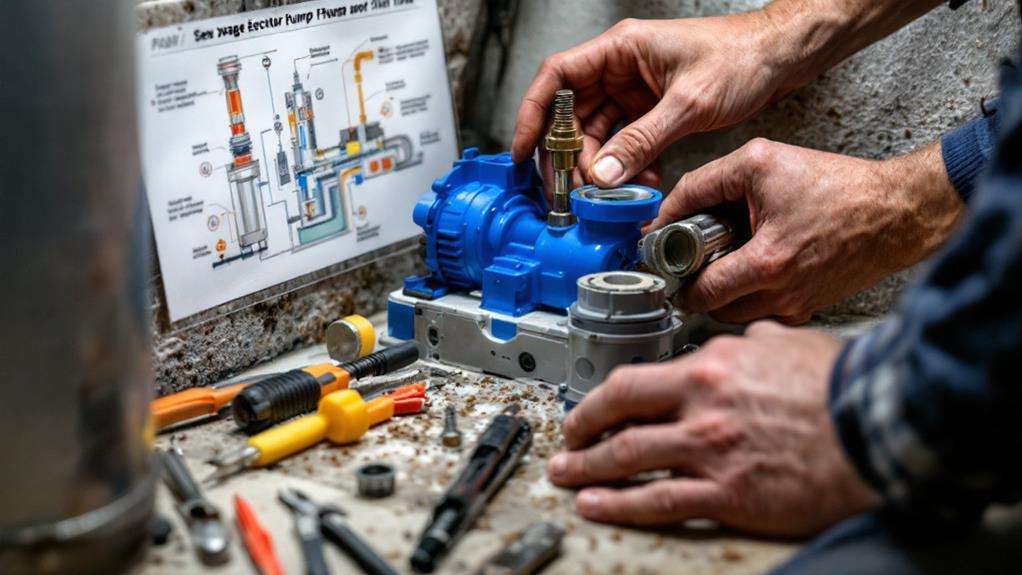
Setting Up the Pump
Setting up the sewage ejector pump is an indispensable step in the installation process. Once you've prepared the installation site and positioned the ejector basin, it's time to focus on the pump itself. Begin by carefully placing the pump in the designated area, ensuring it's near a drain inlet or slightly beneath the basement floor. You'll want to secure the pump base using anchors to prevent any movement during operation.
When connecting the pipes, pay close attention to sealing the pump connections properly. This step is imperative for preventing backflow issues and maintaining the system's efficiency. Make sure you have adequate air circulation around the pump to prevent overheating and extend its lifespan.
As you set up the pump, keep the area free of obstructions and debris. This will help maintain consummate performance and reduce the risk of clogs or backups. Remember, the sewage ejector pump plays a paramount role in safely removing wastewater from your home, so proper installation is key.
Electrical Connections and Testing
With the pump securely in place, it's time to address the electrical connections and testing. To guarantee your sewage ejector pump operates safely and efficiently, you'll need to connect it to a dedicated electrical circuit equipped with a ground fault circuit interrupter (GFCI). This setup meets the power supply requirements and provides essential safety precautions.
You have two options for connecting the pump: plug its power cord directly into a GFCI-protected outlet or wire it to a GFCI-protected circuit breaker. Once connected, test the GFCI functionality by pressing the "test" button and confirming that the power cuts off immediately.
After establishing the electrical connection, monitor the pump's operation. Listen for the motor to activate when water levels rise and shut off when the tank empties. This cycle indicates proper functioning. Additionally, regularly inspect the float switch to verify it moves freely and triggers the pump at the appropriate water level.
Maintenance and Troubleshooting Tips
A well-maintained sewage ejector pump is critical for preventing basement flooding and costly repairs. To keep your pump running smoothly, you'll need to perform regular maintenance and be prepared to troubleshoot issues as they arise.
Start by conducting seasonal inspections of your pump, checking for any debris or clogs that could impair its operation. Clean the pump's impeller and intake screen every 6-12 months to guarantee optimal performance. Don't forget to monitor the float switch, which activates the pump when water levels rise. Test the pump manually to verify it's pumping water out of the basin as expected.
Keep an eye on the pump's indicator lights and address any unusual noises promptly. If you notice the pump failing to operate, check the electrical connections, circuit breaker, and float switch for potential issues. By staying vigilant and addressing problems early, you can extend the life of your sewage ejector pump and avoid costly basement flooding.