
How to Use a Plumber’s Torch for Copper Pipe Repairs
To use a plumber's torch for copper pipe repairs, start by gathering essential tools and materials, including the torch, copper tubing cutters, flux, and lead-free solder. Guarantee proper safety precautions, like checking for gas leaks and wearing protective gear. Prepare the copper pipe by cutting it to size, cleaning it thoroughly, and applying flux. Fit the pipe and fitting together snugly, then heat the joint with the torch. Apply solder to create a watertight seal, and allow it to cool completely. Test the joint for leaks and remove excess flux. With practice, you'll become proficient in this essential plumbing skill and tackle more complex repairs.
Safety Precautions
Before using a plumber's torch for copper pipe repairs, safety must be your top priority. When working with a Bernzomatic torch or any other plumbing blowtorch, you'll need to take several precautions to minimize risks and comply with Health and Safety Law.
First, ensure you're using the right torch for the job. Different repairs may require specific torch capabilities, so select appropriately. Before igniting the torch, check for gas leaks. If you detect any, don't light the torch. Instead, move both the torch and gas cylinder to a well-ventilated area outside. Always disconnect the torch from the gas cylinder when not in use.
Keep a fit-for-purpose, up-to-date fire extinguisher within easy reach. This is essential for quickly addressing any unexpected fires. Never use a torch that you suspect is damaged or blocked. If you notice any issues during use, stop immediately for safety reasons.
Essential Tools and Materials
Along with your plumber's torch, you'll need several essential tools and materials for copper pipe repairs. First, make certain you have a torch with a proper fuel source, typically propane or MAPP gas. You'll also need a striker or lighter to ignite the torch flame.
For working with copper pipes, gather copper tubing cutters, emery cloth, and flux brushes. Copper fittings, such as couplings, elbows, and tees, are vital for joining pipes. Don't forget to have solder on hand; choose lead-free solder specifically designed for plumbing work.
Safety gear is essential, including heat-resistant gloves, safety glasses, and a fire extinguisher. A heat shield or flame-resistant cloth can protect surrounding areas from heat damage. You'll also need pliers, adjustable wrenches, and a wire brush for cleaning and manipulating pipes.
For more complex repairs, consider having a pipe reamer, tubing bender, and pipe deburring tool. A level and measuring tape will help ensure precise installations. Finally, keep a bucket, rags, and a shop vacuum nearby to manage any water spills or debris during the repair process.
Preparing the Copper Pipe
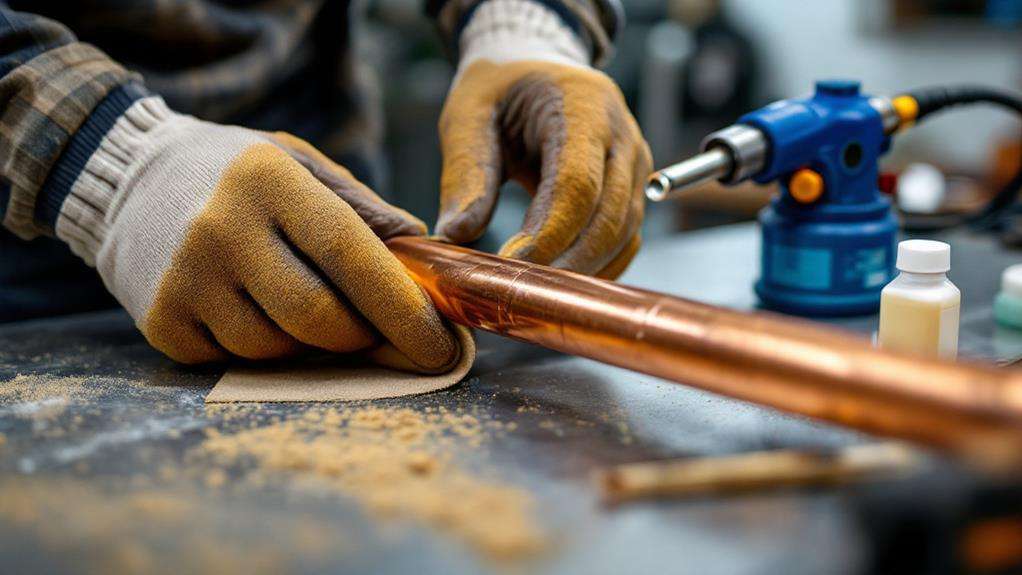
How do you guarantee a successful copper pipe repair? It all starts with proper preparation. Begin by cutting the copper pipe to the desired length using a pipe cutter. This makes a clean, straight cut that's critical for a tight fit.
Next, focus on cleaning the pipe ends. Use fine-grit sandpaper (120 grit or finer) to thoroughly remove any oxidation. This step is pivotal for creating a strong bond when you solder the joints. After cleaning, apply a thin, even coat of paste flux to the pipe ends. The flux helps the solder flow smoothly and adhere properly.
Before you start soldering, make sure the pipe ends fit snugly into the fittings. A tight fit is essential for a leak-free connection. If there's any gap, the solder won't be able to create a proper seal.
Once you've assembled the pipe and fittings, take a moment to remove any excess flux from their surfaces. This step prevents corrosion and assures a clean, professional-looking finish. By following these preparation steps carefully, you'll set yourself up for a successful copper pipe repair that'll stand the test of time.
Applying Flux and Fitting
With flux and fitting in hand, you're ready to take the next imperative step in your copper pipe repair. Before applying flux, thoroughly clean both the pipe and fitting surfaces using emery cloth to remove any oxidation. This indispensable step guarantees optimal adhesion and prevents impurities from compromising your solder joint.
Next, apply flux evenly to both the inside of the fitting and the outside of the pipe. The flux acts as a cleaning agent and helps the solder flow smoothly, creating a strong bond. Be sure to cover all surfaces that will come into contact when you join the pipe and fitting.
Once you've applied the flux, carefully slide the pipe into the fitting. It is critical to verify a snug fit between the two components. This tight connection is paramount for proper solder flow and joint integrity. If the fit isn't secure, you may need to clean the surfaces again or consider replacing the fitting.
Before moving on to soldering, double-check that the pipe is fully inserted into the fitting. A proper fit will ensure that the solder copper joint is strong and leak-free, giving you a lasting repair that meets professional standards.
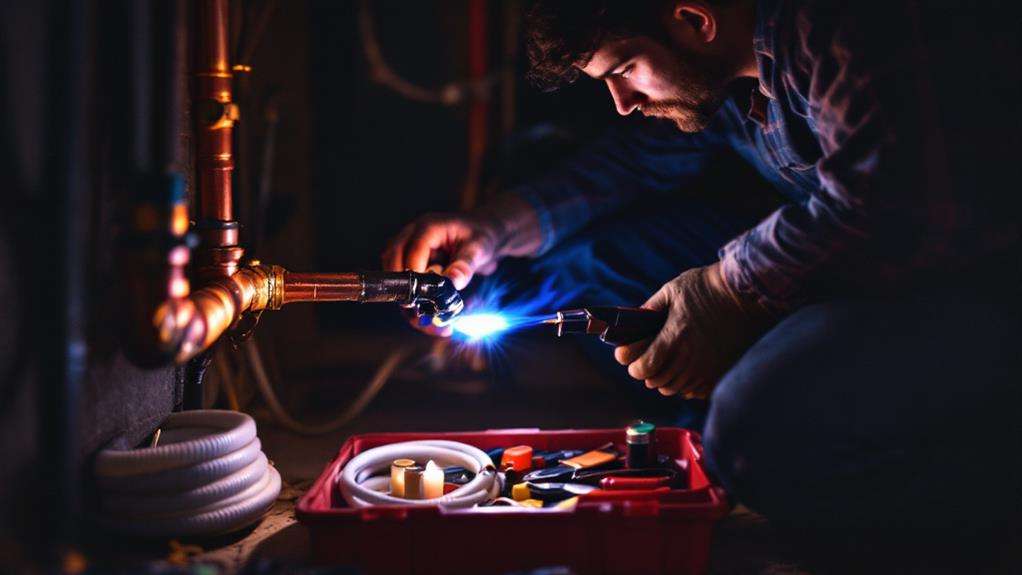
Soldering Technique
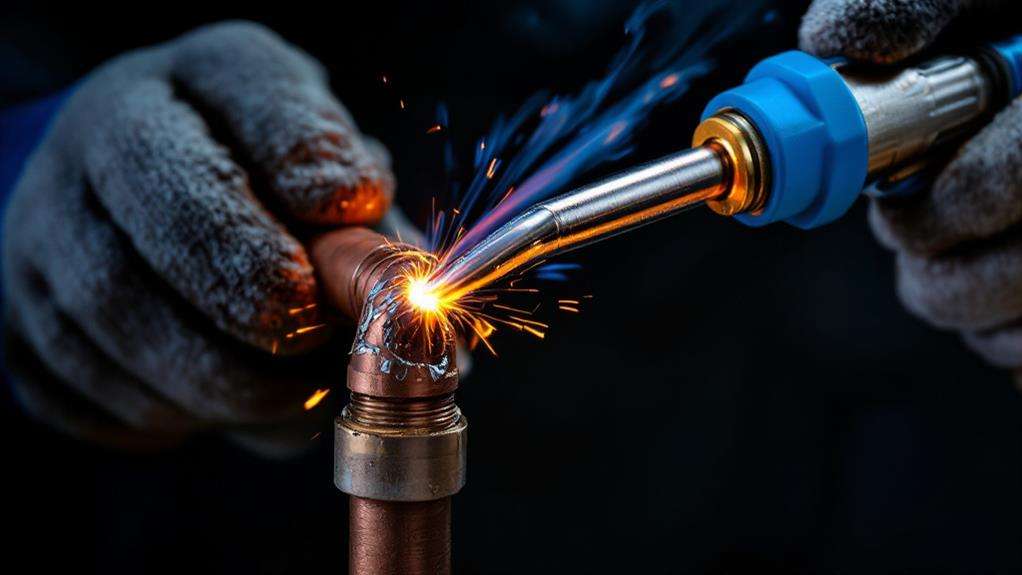
Commanding the soldering technique is essential for creating a watertight seal in your copper pipe repair. Begin by lighting your torch and adjusting the flame to a soft, blue cone. Hold the flame about an inch from the joint, moving it constantly to heat the entire area evenly. You'll know it's hot enough when the flux begins to bubble and turn clear.
Once the joint reaches the proper temperature, remove the flame and quickly touch your solder to the joint where the pipe and fitting meet. If it's hot enough, the solder will immediately melt and be drawn into the joint by capillary action. Continue adding solder until you see a thin line appear around the entire circumference of the joint.
Be careful not to overheat the pipe or apply too much solder, as this can weaken the connection. After soldering, allow the joint to cool naturally for a few minutes. Don't try to wipe off excess solder or move the pipe until it's completely cooled. Once it's set, you can clean any remaining flux residue with a damp cloth to prevent corrosion.
Cooling and Testing
After completing the soldering process, proper cooling and testing are vital steps to guarantee a successful repair. Once you've used the torch to solder copper pipes, allow the joint to cool completely before handling or pressurizing the system. This cooling period is essential for the solder to solidify properly and create a strong bond.
While waiting for the joint to cool, inspect it for any signs of discoloration or oxidation, which may indicate issues with your soldering technique. Once cooled, use a damp rag to remove any excess flux residue from the joint. This step helps prevent corrosion and guarantees a clean finish.
Next, check the joint for a consistent, shiny appearance, which indicates proper solder penetration. If you notice any irregularities or dull spots, you may need to reheat and reapply solder to those areas.
Adapting to Flexible PEX
Modern plumbing systems often incorporate both copper and PEX piping, requiring adaptations between the two materials. When you're working on a plumbing project that involves moving from copper to flexible PEX pipe, you'll need to use special fittings to connect the two.
To make this change, start by soldering a 90-degree fitting onto your copper pipe. This creates a bend that allows for greater flexibility in your plumbing system. Next, attach a PEX adapter fitting to the copper pipe. This adapter is specifically designed to connect copper to PEX, enabling you to join the two different materials seamlessly.
Using PEX in your plumbing system offers several advantages, especially during renovations and repairs. Its flexibility makes it easier to route around obstacles and through tight spaces, which can be particularly helpful when installing a new water heater or updating existing plumbing. By combining copper and PEX, you're able to employ the strengths of both materials in your plumbing system.
Capping Off Pipe Ends
When you're working on a plumbing project, you'll often encounter situations where you need to cap off pipe ends. This process is essential for sealing copper pipe stubs and providing a clean, finished look to your plumbing work.
To cap off a pipe end, start by cutting off the old pipe to prepare for capping. Make sure you have a clean, straight cut to ensure a proper fit for the copper cap. Next, add the copper cap to the end of the pipe. It's pivotal to select a cap that matches the pipe's diameter for a snug fit.
Once the cap is in place, you'll need to solder it to create a watertight seal. Use your plumber's torch to heat the joint between the pipe and the cap, applying solder as needed. This step requires precision and care to guarantee a proper seal.
Remember to always follow safety guidelines and your local plumbing codes when working with a torch. Additionally, be aware of your plumber's Privacy Policy when hiring professional help for more complex repairs. By conquering the technique of capping off pipe ends, you'll be able to tackle various plumbing projects with confidence and skill.