
How to Repair Leaky Pipes in Your Home
To repair leaky pipes in your home, start by identifying the source of the leak. Look for water stains, musty odors, or unusual sounds. Gather essential tools like pipe wrenches, Teflon tape, and repair kits. For minor leaks, you can apply pipe repair tape or epoxy putty as a temporary fix. Address dripping faucets by replacing worn washers or O-rings. For more severe issues, you may need to replace damaged pipe sections or address corrosion problems. Don't forget to shut off the water supply before starting any repairs. Regular maintenance and inspections can help prevent future leaks. If you're unsure about tackling a repair, it's best to consult a professional plumber.
Identifying Common Pipe Leaks
In order to repair leaky pipes, you'll first need to identify the source and type of leak. Start by checking for water stains on walls, ceilings, or floors, as these can indicate hidden leaks. Pay attention to musty odors or the sound of running water when no taps are on. Inspect visible pipes, especially those under sinks, for signs of corrosion, discoloration, or moisture.
Look for puddles or damp spots around the base of toilets, water heaters, and washing machines. Test your water meter by turning off all water sources and checking if the meter still runs, indicating a leak. Examine outdoor spigots and irrigation systems for drips or unusual wet areas in your yard.
Common types of leaks include pinhole leaks in copper pipes, joint leaks at pipe connections, and cracks in PVC pipes. Frozen pipes can also burst, causing significant damage. If you suspect a slab leak, look for warm spots on the floor or unexplained increases in your water bill. By systematically inspecting your plumbing system, you'll be able to pinpoint the source of the leak and determine the best repair method.
Essential Tools for Pipe Repair
A well-stocked toolbox is crucial for effective pipe repair. When tackling leaky pipes, you'll need a variety of DIY plumbing supplies to get the job done right. Start by investing in quality pipe wrenches, adjustable pliers, and a hacksaw for cutting pipes. Don't forget to include Teflon tape and plumber's putty for sealing joints and connections.
Pipe repair kits are essential for quick fixes and emergencies. These kits typically contain:
- Pipe clamps for temporary leak control
- Epoxy putty for sealing small holes
- Silicone tape for wrapping damaged areas
You'll also want to have a supply of replacement parts on hand, such as couplings, unions, and various sizes of pipe sections. A pipe cutter is indispensable for making clean, precise cuts when replacing damaged sections. For more complex repairs, consider adding a propane torch and solder to your arsenal for sweating copper pipes.
Remember to include safety gear like work gloves and safety goggles in your toolkit. With these essential tools at your disposal, you'll be well-prepared to tackle most common pipe repair tasks in your home.
Locating Hidden Leaks
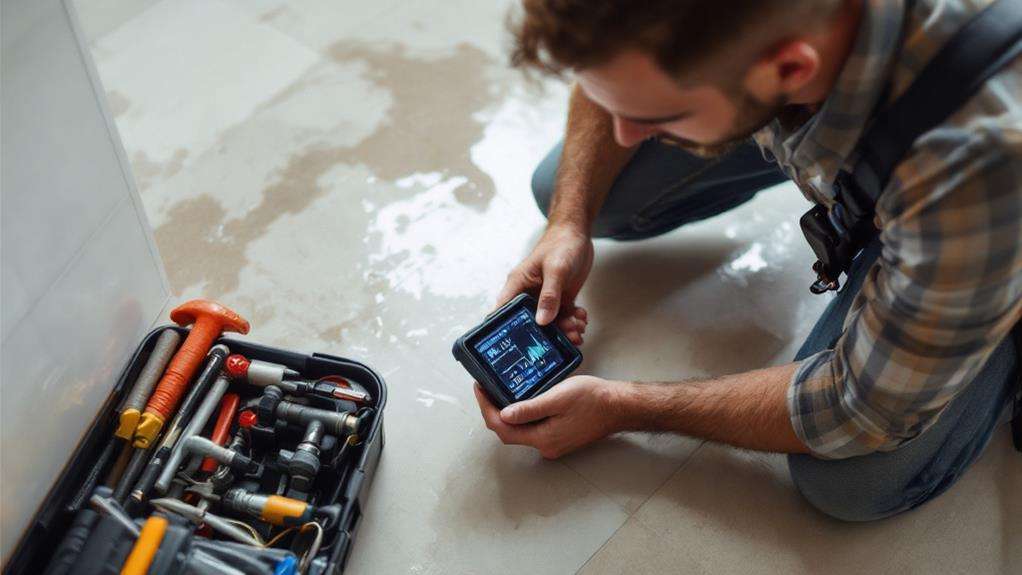
Hidden leaks often pose a significant challenge for homeowners. They can cause extensive damage before you even notice them, making early detection essential. To locate hidden leaks, start by inspecting walls and floors for signs of water damage, such as discoloration, warping, or mold growth. Pay close attention to areas around pipes, especially in basements, crawl spaces, and under sinks.
If visual inspection doesn't reveal the leak's location, it's time to use leak detection tools. A moisture meter can help you identify damp areas in walls or floors, pinpointing potential leak sources. For more precise detection, consider using an acoustic leak detector. This device amplifies the sound of water escaping from pipes, allowing you to trace the leak to its origin.
For slab leaks, a thermal imaging camera can be extremely useful. It detects temperature differences caused by water seepage, helping you locate leaks beneath concrete floors. If you suspect a leak in your main water line, you'll need to check your water meter. Turn off all water sources in your home and observe the meter; if it's still running, you likely have a hidden leak.
Temporary Fixes for Emergencies
Pipe leaks can crop up at the most inconvenient times, often requiring quick action to prevent water damage. When faced with a sudden leak, you'll need to employ temporary fixes as quick stopgap measures until professional help arrives or you can implement a permanent solution.
One of the most effective makeshift leak containment methods is using pipe repair tape. This specialized tape is designed to withstand water pressure and can be wrapped tightly around the leaking area. For small pinhole leaks, you can apply epoxy putty. This moldable substance hardens quickly, creating a temporary seal.
Another option is a pipe repair clamp, which fits around the pipe and tightens to stop the leak. These clamps are particularly useful for larger cracks or holes. While implementing these emergency fixes, remember to:
- Turn off the main water supply to reduce pressure
- Dry the pipe thoroughly before applying any repair materials
- Keep necessary tools and supplies readily accessible for future emergencies
These temporary solutions can buy you pivotal time, minimizing water damage and allowing you to plan for a more permanent repair. However, it's essential to address the underlying issue as soon as possible to prevent further damage and potential structural problems.
Repairing Dripping Faucets
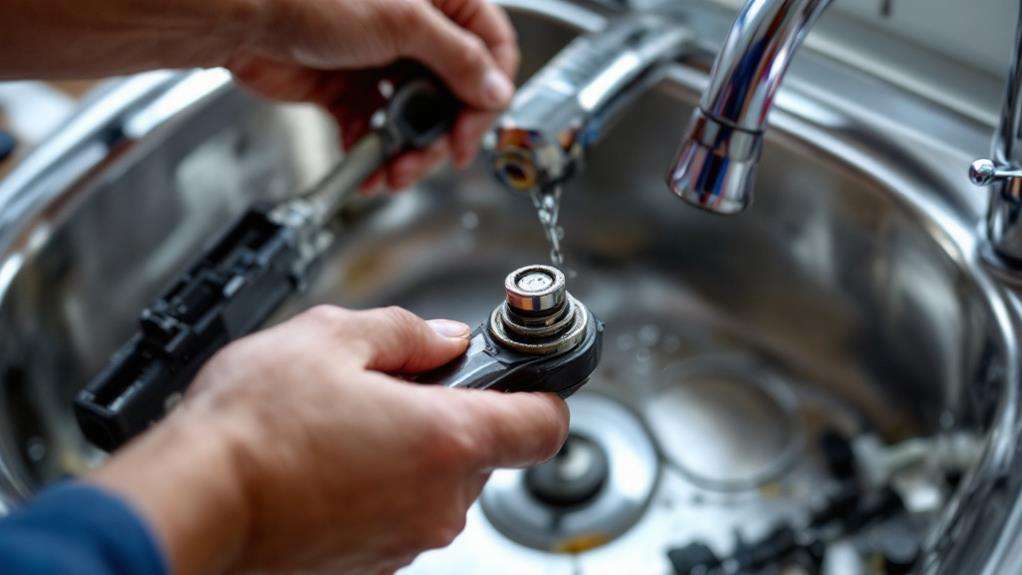
Dripping faucets can be more than just a minor annoyance; they're often a sign of underlying issues and can waste significant amounts of water over time. To repair a dripping faucet, you'll need to identify the cause and take appropriate action.
Start by turning off the water supply to the faucet. Remove the handle and unscrew the packing nut to access the stem. Inspect the O-ring and washer for signs of wear or damage. If you notice any issues, replace these components. Reassemble the faucet, making sure to tighten all parts securely.
If the drip persists, you may need to address mineral buildup. Soak the faucet components in white vinegar for a few hours to dissolve deposits. Scrub gently with a soft brush before reassembling.
For compression faucets, focus on tightening faucet components. Check the seat washer and valve seat for wear, replacing them if necessary. With cartridge faucets, you might need to replace the entire cartridge unit.
Regular faucet maintenance tips include avoiding excessive force when turning handles, using water softeners to prevent mineral buildup, and periodically cleaning aerators. By addressing drips promptly, you'll save water and prevent more serious plumbing issues.
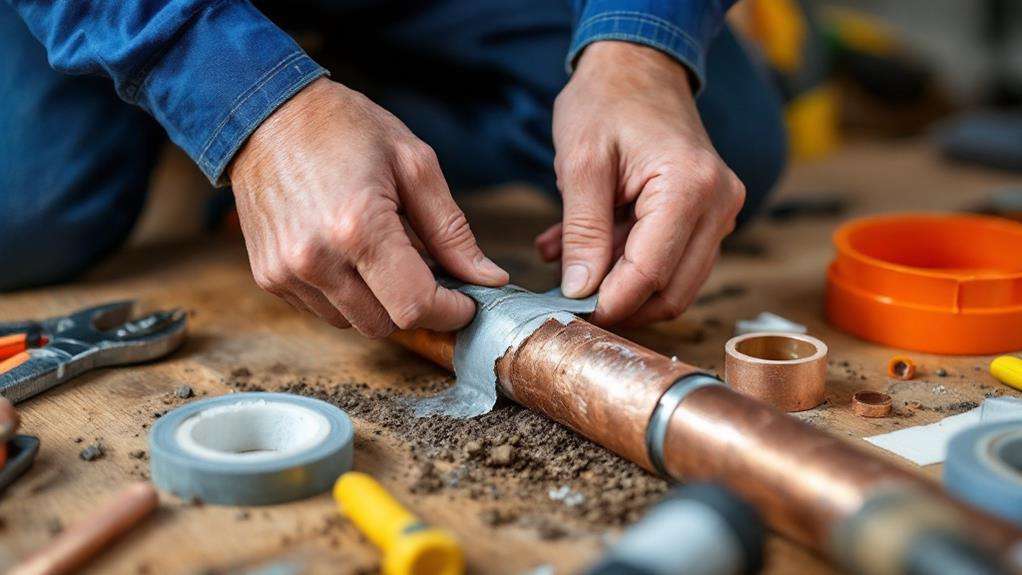
Fixing Leaky Pipe Joints
While fixing dripping faucets is a common household task, addressing leaky pipe joints often requires more attention and skill. Leaky pipe joints can cause significant water damage if left unattended, so it's essential to address them promptly.
To fix leaky pipe joints, start by identifying the source of the leak. Look for signs of water damage or moisture around pipe connections. Once you've located the problem area, you'll need to:
- Turn off the water supply to the affected pipe
- Drain the pipe by opening nearby faucets
- Dry the area thoroughly before attempting repairs
When sealing pipe joints, you have several options depending on the severity of the leak and the type of pipe. For minor leaks, tightening pipe connections with a wrench may be sufficient. If this doesn't work, you might need to apply pipe joint compound or plumber's tape to create a better seal.
For more severe leaks, you may need to replace the entire joint or section of pipe. This process involves cutting out the damaged portion and installing a new piece using appropriate fittings and connectors. Always make certain proper alignment and secure connections when replacing pipe sections to prevent future leaks.
Addressing Pipe Corrosion Issues
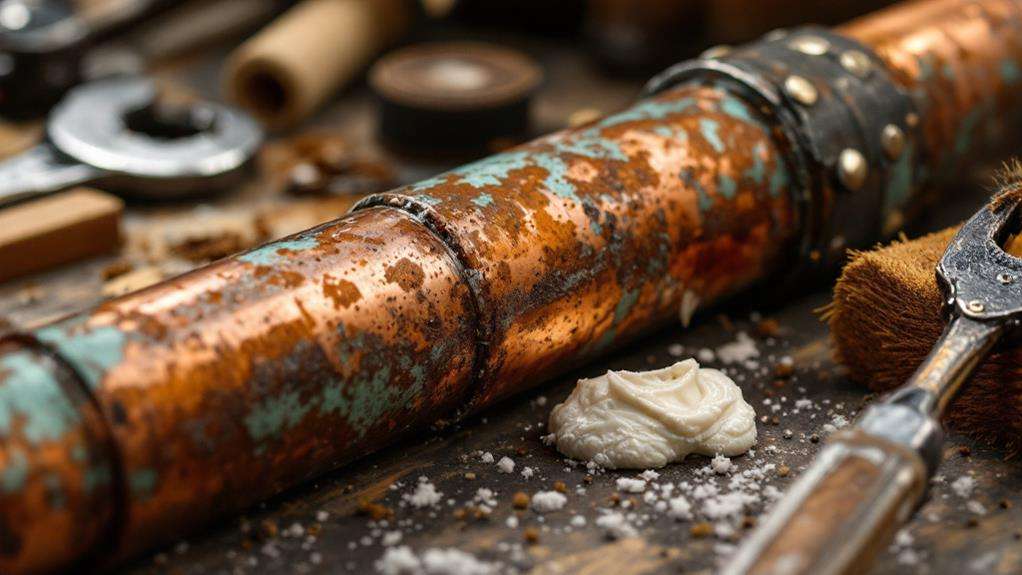
Occasionally, pipe corrosion can be a more insidious cause of leaks than simple joint failures. To address this issue, you'll need to start by identifying pipe corrosion causes. Check for signs of rust, discoloration, or pitting on the pipe's surface. These indicators often point to underlying problems such as high water acidity, excessive mineral content, or bacterial growth.
Once you've identified the cause, it's essential to address water quality issues. You might need to install a water softener or filtration system to remove harmful minerals and balance pH levels. If bacterial growth is the culprit, consider shock chlorination or UV treatment for your water supply.
For pipes already affected by corrosion, you have several options. You can try applying a corrosion-resistant epoxy coating to the pipe's interior, which can extend its lifespan. In more severe cases, you may need to replace the corroded sections entirely. Choose corrosion-resistant materials like PVC, copper, or stainless steel for replacements.
Replacing Damaged Pipe Sections
When it comes to replacing damaged pipe sections, you'll need to approach the task methodically. First, shut off the water supply and drain the pipes. Then, measure the damaged section and purchase the appropriate replacement pipe and fittings. You'll need to cut out the damaged portion using a pipe cutter or hacksaw, ensuring clean, straight cuts.
For cutting and splicing pipe sections, follow these steps:
- Remove any burrs or rough edges from the cut ends
- Apply pipe primer and cement to the new pipe and fittings
- Quickly assemble the new section, ensuring proper alignment
When dealing with complex pipe configurations, you may need to use flexible couplings or compression fittings to accommodate slight misalignments. These can make the job easier, especially in tight spaces or when working with older plumbing systems.
After installation, turn the water back on slowly and check for leaks. If you're unsure about your ability to handle the replacement, don't hesitate to call a professional plumber. They have the tools and skills to tackle even the most challenging pipe replacements, ensuring a long-lasting and leak-free solution.
Preventing Future Leaks
After you've successfully repaired your leaky pipes, you'll want to take steps to prevent future issues. Start by installing pipe insulation, especially in areas prone to freezing temperatures. This simple measure can protect your pipes from extreme temperature changes, lowering the risk of cracks and leaks.
Regularly inspect your plumbing system for signs of wear, corrosion, or minor leaks. Address any issues promptly to prevent them from escalating into major problems. Be mindful of your water pressure; excessive pressure can strain pipes and joints. Consider installing a pressure regulator if needed.
Avoid using harsh chemical drain cleaners, as they can corrode pipes over time. Instead, opt for enzymatic cleaners or mechanical methods to clear clogs. Keep your gutters clean and guarantee proper drainage around your home's foundation to prevent water from seeping into your basement and damaging pipes.
Educate yourself and your family about your home's plumbing system. Know where the main water shut-off valve is located and how to use it in case of emergencies. By taking these proactive measures, you'll considerably reduce the likelihood of future leaks and mitigate potential water damage to your home.
When to Call a Professional
While DIY repairs can save money, it's important to recognize your limits. When dealing with complex plumbing issues, calling a professional plumber is often the wisest choice. You should consider contacting an expert if:
- The leak is in a hard-to-reach area, such as behind walls or under concrete slabs
- You're unsure about the source of the leak or its severity
- The repair requires specialized tools or knowledge you don't possess
Assessing repair costs is indispensable when deciding whether to hire a professional. Compare the potential expenses of DIY repairs, including tools and materials, against the cost of professional services. Remember that botched DIY attempts can lead to more extensive damage and higher repair bills in the long run.
When evaluating contractor options, research local plumbers thoroughly. Check their licenses, insurance, and customer reviews. Request quotes from multiple professionals to guarantee you're getting a fair price. Don't hesitate to ask about their experience with similar repairs and any warranties they offer on their work. By carefully pondering your options and understanding the scope of the problem, you'll be better equipped to decide whether professional help is necessary for your leaky pipe situation.