
How to Install an In-Ground Sprinkler System
To install an in-ground sprinkler system, start by planning your layout and gathering necessary materials. Measure your yard, sketch the area, and consider soil type and water coverage. Next, dig trenches 6-8 inches deep and lay PVC pipes, connecting them with fittings and thread tape. Install sprinkler heads, ensuring even spacing and overlapping spray patterns. Connect the system to your water supply, install a backflow preventer, and wire zone valves to the timer. Finally, test the system for proper pressure and leaks. With careful planning and execution, you'll be on your way to a lush, effortlessly watered lawn.
Planning Your Sprinkler System
Planning your sprinkler system is a vital first step in creating an efficient irrigation solution for your yard. Begin by measuring the area to be covered and sketching your property, noting key features like your home, trees, driveway, and gardens. This blueprint will help you determine the ideal layout for your underground sprinkler system.
Next, assess your soil type and its water retention properties. This information will guide you in deciding the water usage and flow needed for different areas of your lawn. Map out the required water coverage, guaranteeing overlapping sprays from sprinkler heads to prevent dry spots. Don't forget to think about adding drip irrigation for flower beds and gardens to supplement your lawn sprinkler system.
Measure your water pressure using a gauge to ensure your system can operate effectively. This step is indispensable as it affects the performance of your sprinklers and helps determine the appropriate pipe and fitting sizes. Locate your water meter and main supply line to plan the connection point for your system. By carefully planning your sprinkler system, you'll create a more efficient and effective irrigation solution that gives your yard the water it needs while minimizing waste.
Gathering Materials and Tools
With your sprinkler system plan in hand, it's time to gather the necessary materials and tools. To Install an In-Ground sprinkler system, you'll need safety gear, marking tools, a sprinkler system kit, and a control system. Don't forget a trenching machine for efficient digging, or a spade with a square edge if you're doing it manually.
For the piping, you'll need PVC pipes, a pipe cutter, and PVC cement to connect the pieces. Make sure to get a valve box to house your manifold and protect it from the elements. You'll also need to connect to your main water line, so have a pressure gauge and backflow prevention device ready.
When selecting your sprinkler heads, choose ones that match your yard's needs and water pressure. Remember to get a variety of spray patterns for different areas. Finally, don't overlook small but pivotal items like teflon tape for sealing connections and wire connectors for the control system. By gathering all these materials beforehand, you'll guarantee a smooth installation process and avoid unnecessary delays.
Digging Trenches and Laying Pipes
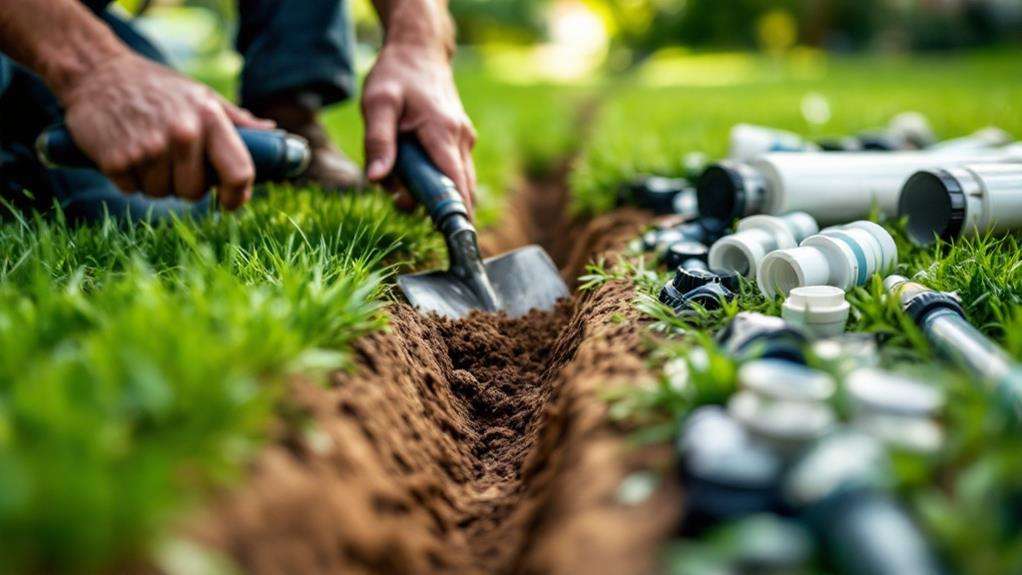
Your sprinkler system's success hinges on proper trenching and pipe installation. Begin by digging trenches 6 to 8 inches deep, accounting for your yard's topography. Line these trenches with geotextile fabric to prevent soil from clogging your pipes. Next, lay out your PVC pipes in the trench to complete a comprehensive system. Measure and mark the pipes according to your layout, then cut them using a hacksaw or PVC cutter.
When laying the pipes, ensure they're flat with no kinks or bends. Connect them firmly using fittings like T-joints and elbows. For extra security, use thread tape at pipe connections. Here's a quick checklist to follow:
- Dig trenches and line with geotextile fabric
- Lay out and measure PVC pipes
- Cut pipes and place in trenches
- Connect pipes using fittings and thread tape
Installing Sprinkler Heads
Once you've laid the pipes, it's time to install the sprinkler heads. Begin by firmly pushing each sprinkler head into the PVC pipes connects, guaranteeing a tight fit to prevent leaks. If you're using pop-up sprinklers, make sure to bury the sprinkler bodies so that the top of the spray nozzle is flush with the ground when retracted.
Next, focus on achieving even spacing between sprinkler heads to ensure full lawn coverage. Overlap the spray patterns slightly to avoid dry spots. For ideal performance, adjust the spray angle and radius of each sprinkler head. This customization allows you to accommodate different lawn shapes and sizes.
Consider installing adjustable or variable spray pattern sprinklers in areas with irregular shapes or near obstacles. These versatile heads allow you to fine-tune the coverage area, maximizing efficiency and water conservation.
As you work, periodically test the system to verify proper function and coverage. Make any necessary adjustments to the sprinkler heads' positioning or spray patterns. Remember, proper installation and adjustment of your sprinkler heads are vital for maintaining a healthy, evenly watered lawn while minimizing water waste.
Connecting and Testing the System
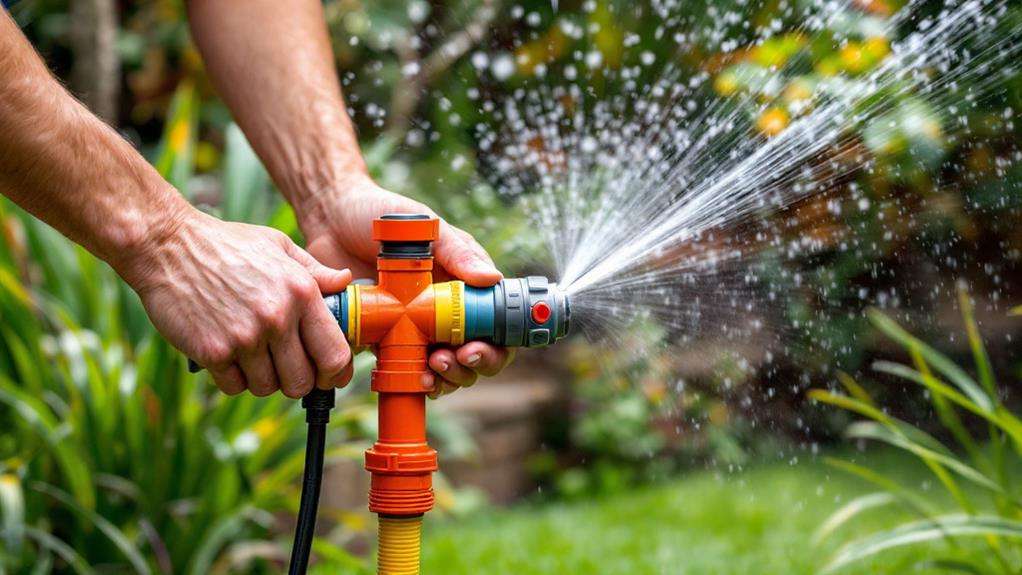
The final step in installing your in-ground sprinkler system involves connecting it to the water supply and running thorough tests. Begin by connecting the water supply line to your sprinkler system's main line using PVC fittings and glue. It's essential to install a backflow preventer device to protect your potable water supply from contamination.
Once you've made the connections, it's time to wire the zone valves to your sprinkler timer. This allows you to control each zone independently. Before burying any pipes, you'll need to test the system thoroughly. Here's what you should do:
- Turn on the water supply and check the pressure (measured in pounds per square inch).
- Run each zone individually, guaranteeing proper operation and adjusting sprinkler heads for even coverage.
- Measure the water flow rate in gallons per minute to ensure it meets your system's requirements.
- Conduct a full cycle test to identify any leaks or issues with pipe connects, fittings, and the outside components.