
How to Install a Sump Pump for Basement Flood Protection
To install a sump pump for basement flood protection, start by evaluating your basement's needs and choosing the right pump. Gather necessary tools and materials, then locate the ideal position for the pump. Dig a sump pit, install the pump, and set up the discharge line to direct water away from your home. Connect the electrical system, ensuring proper safety measures are in place. Finally, test the installation and establish a regular maintenance routine. Remember to follow local building codes throughout the process. By following these steps, you'll be well on your way to safeguarding your basement against potential flooding and water damage.
Assess Your Basement's Needs
Before diving into the installation process, it's crucial to assess your basement's specific needs. Start by evaluating existing drainage systems, including any current sump pits or French drains. Observe how water flows during heavy rains and note areas where moisture accumulates. This will help you determine the ideal location for your new sump pump.
Next, inspect for cracks and leaks in your basement walls and floor. These vulnerabilities can allow water to seep in, potentially overwhelming your pump system. Address any structural issues before proceeding with the installation. Consider the water table in your area and how it fluctuates throughout the year. This information will guide you in selecting the appropriate pump capacity.
Measure your basement's square footage and calculate the volume of water it might need to handle during a severe weather event. Don't forget to factor in any additional water sources, such as washing machines or water heaters. Evaluate your home's electrical system to support the pump's power requirements. Finally, check local building codes and regulations regarding sump pump installations, as some areas may have specific requirements or restrictions.
Choose the Right Sump Pump
Selecting the right sump pump is critical for effective basement flood protection. You'll need to consider several factors to guarantee you choose a pump that meets your specific needs. The two most important aspects to focus on are pump capacity and pump type.
Pump capacity refers to how many gallons of water the pump can move per hour. To determine the appropriate capacity, think about your basement's size, local rainfall patterns, and the water table in your area. Pump type refers to whether you need a submersible or pedestal pump. Submersible pumps sit inside the sump pit, while pedestal pumps are mounted above it.
When choosing your sump pump, keep these key points in mind:
- Horsepower: Higher HP means more pumping power
- Material: Opt for corrosion-resistant materials like cast iron or stainless steel
- Switch type: Choose between manual, automatic, or electronic switches
- Backup power: Consider a battery backup for protection during power outages
- Warranty: Look for pumps with longer warranties for added peace of mind
Gather Necessary Tools and Materials

With your sump pump chosen, it's time to gather the tools and materials you'll need for installation. Start by identifying basement waterproofing methods that complement your sump pump system, such as interior drainage tiles or exterior waterproofing. You'll need a shovel, hammer drill, reciprocating saw, and level for the installation process.
Select appropriate power supply requirements for your pump, guaranteeing you have the correct electrical components like a GFCI outlet, waterproof junction box, and appropriate gauge wire. Don't forget to obtain PVC pipes, check valves, and fittings for the discharge line.
You'll also need concrete mix, gravel, and a sump pit liner. For safety, gather personal protective equipment including safety glasses, gloves, and a dust mask. Additional tools to have on hand include a tape measure, utility knife, pipe wrench, and screwdrivers.
Consider renting a jackhammer if you need to break through concrete flooring. Ultimately, pick up a battery backup system to keep your pump running during power outages. Having all these items ready will guarantee a smooth installation process and effective basement flood protection.
Locate the Ideal Pump Position
The cornerstone of effective sump pump installation lies in choosing the right location. To find the ideal spot, you'll need to survey your basement floor layout and evaluate potential problem areas. Look for the lowest point in your basement, as water naturally flows to these areas. It's essential to position your sump pump where it can efficiently collect and remove water before it becomes a problem.
When locating the ideal pump position, consider these factors:
- Proximity to exterior walls for easier discharge pipe installation
- Distance from electrical outlets for power supply
- Accessibility for maintenance and repairs
- Potential obstructions like furniture or appliances
- Noise considerations for living spaces above
Once you've identified the lowest point, mark it clearly. You'll want to install the sump pit here, ensuring it's at least 8 inches away from any walls to prevent foundation issues. If your basement has multiple low points, you might need to install more than one sump pump. Don't forget to check local building codes, as they may have specific requirements for sump pump placement. By carefully selecting the right location, you'll maximize your pump's effectiveness and minimize the risk of basement flooding.
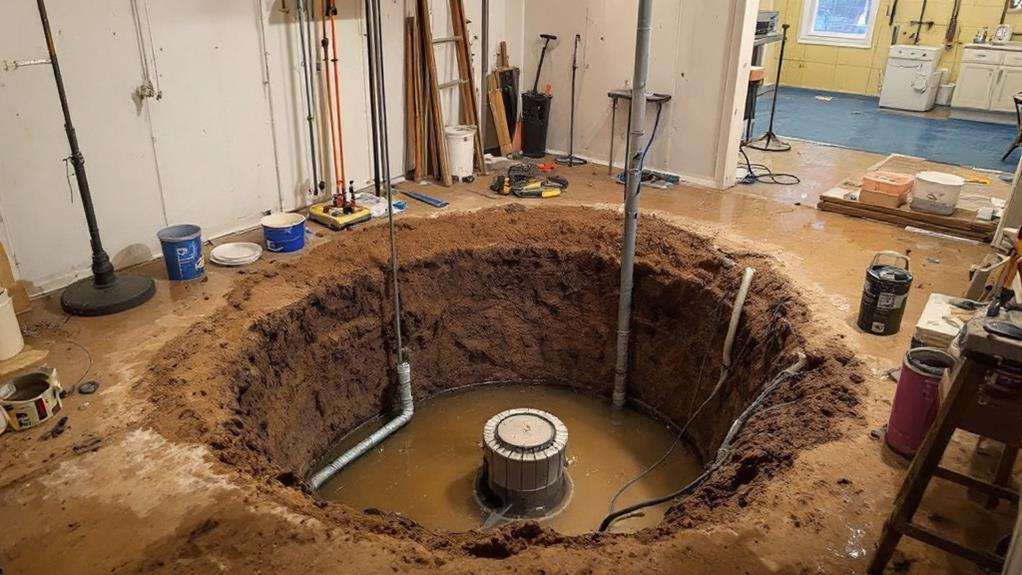
Dig the Sump Pit
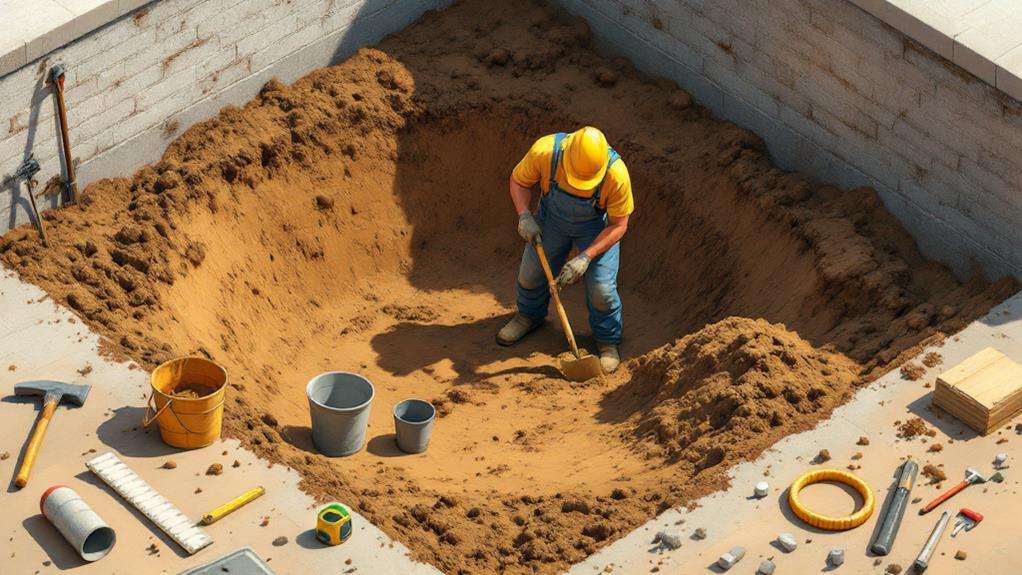
Digging into the task of creating a sump pit is your next vital step. Begin by marking the pit's location with spray paint or chalk, ensuring it's at least 8 inches away from the basement walls. Use a jackhammer or concrete saw to break through the basement floor, then remove the debris.
Excavate the pit to a depth of about 30 inches and a diameter of 24 inches. As you dig, pay attention to soil compaction requirements. The pit's sides should be firm and stable to prevent cave-ins. If you encounter loose soil, consider using a pit liner for added stability.
Proper pit dimensions are indispensable for ideal pump performance. The bottom should be level and slightly wider than the top to accommodate the pump and float switch. Install a layer of gravel at the base to improve drainage and prevent mud from clogging the pump.
Once you've achieved the correct depth and shape, clean the pit thoroughly. Remove any loose soil or debris that could interfere with the pump's operation. Finally, smooth the edges of the concrete floor around the pit to certify a proper seal when you install the sump pump liner.
Install the Sump Pump
Now that you've prepared the pit, how do you proceed with installing the sump pump? The setup procedure is straightforward, but it's imperative to follow the manufacturer's instructions carefully. Begin by placing the pump in the pit, ensuring it sits level on a solid surface. Connect the discharge pipe to the pump's outlet, using PVC cement to create a watertight seal. Run the pipe to the designated outdoor drainage area, making sure it's sloped away from your home's foundation.
Next, install a check valve on the discharge pipe to prevent water from flowing back into the pit. Connect the pump to a dedicated electrical circuit, preferably with a ground fault circuit interrupter (GFCI) outlet for added safety. Before finishing, test the pump by pouring water into the pit and observing its operation.
- Use a properly sized pump for your basement's needs
- Install a battery backup system for added protection
- Ensure proper ventilation to prevent moisture buildup
- Regularly clean and maintain the pump to prevent clogs
- Consider installing a water alarm for early detection of issues
If you encounter any troubleshooting issues during installation, consult the manufacturer's manual or seek professional help. Proper installation is critical for effective basement flood protection.
Set Up the Discharge Line
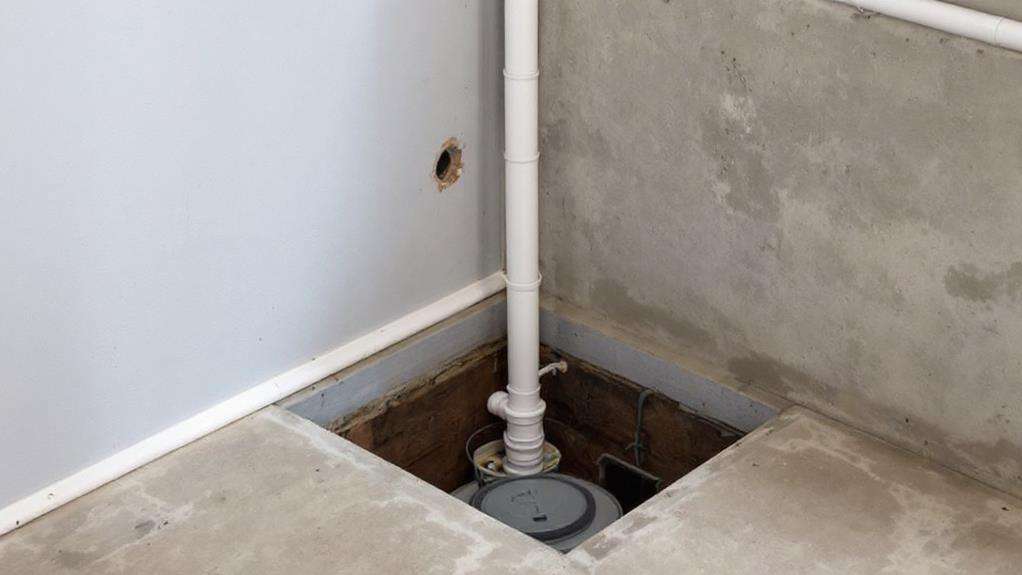
With the sump pump in place, it's time to focus on setting up the discharge line. This essential component carries water away from your home, preventing it from recirculating back into the basement. Begin by attaching a check valve to the pump's outlet to prevent backflow. Then, connect PVC piping to the valve, making sure all joints are properly sealed.
When planning your discharge line routing, choose the shortest path to the exterior of your home. Avoid sharp bends that can reduce flow efficiency. If possible, route the pipe through the rim joist or a nearby window well. Make certain the pipe has a slight downward slope to facilitate water flow.
For discharge line termination, extend the pipe at least 10 feet away from your home's foundation. Direct the water towards a drainage ditch, storm sewer, or retention pond. Install a splash block at the outlet to prevent soil erosion. In colder climates, consider using a special drain line attachment that prevents freezing and allows water to exit even when the ground is covered in snow.
Remember to check local building codes for specific requirements regarding sump pump discharge line installation and termination points.
Connect the Electrical System
Connecting the electrical system is an essential step in guaranteeing your sump pump operates reliably. You'll need to wire the pump to a dedicated circuit, preferably with a ground fault circuit interrupter (GFCI) for added safety. Before starting, turn off the main power supply to avoid any electrical accidents. Install a waterproof outlet box near the sump pit, making sure it's elevated above potential flood levels.
When wiring the pump, follow these key steps:
- Strip the wire ends carefully
- Connect the black (hot) wire to the brass terminal
- Attach the white (neutral) wire to the silver terminal
- Connect the green (ground) wire to the green screw
- Secure all connections tightly to prevent loose wires
After completing the wiring, conduct electrical troubleshooting to boost everything is functioning correctly. Test the GFCI outlet and verify that the pump turns on when the float switch is raised. Pay close attention to electrical safety considerations throughout the process, such as using proper insulation and avoiding water contact with live wires.
If you're unsure about any aspect of the electrical work, don't hesitate to consult a licensed electrician. They can help guarantee your installation meets local building codes and safety standards, providing peace of mind for your basement flood protection system.
Test and Maintain Your Installation
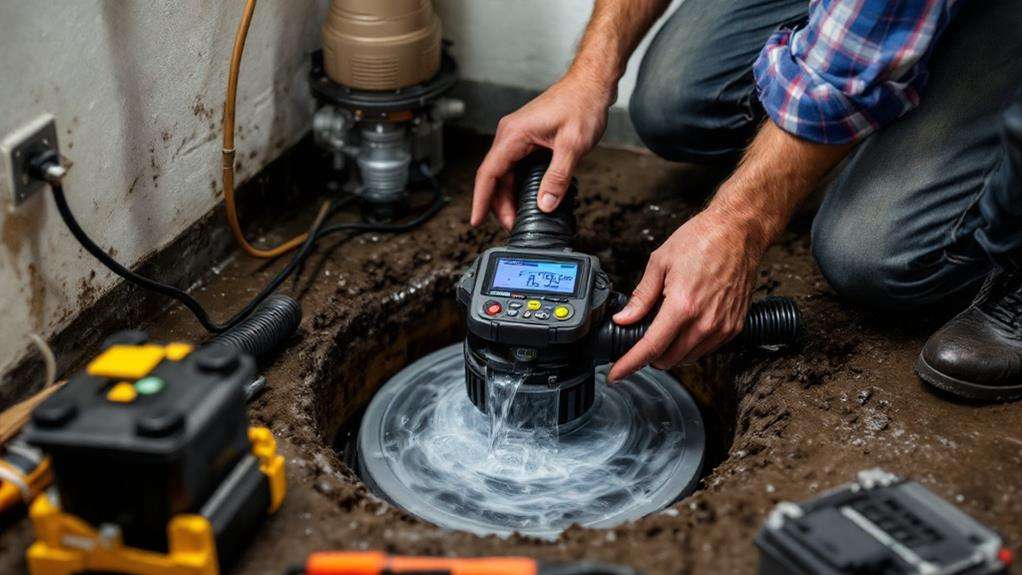
Once your sump pump is installed and wired, it's time to test and maintain your system. Begin by filling the sump pit with water using a garden hose or bucket. Observe the pump's activation as the water level rises, ensuring it starts and stops at the correct levels. Listen for any unusual noises and check for leaks in the discharge pipe.
To monitor pump performance, regularly inspect the system during heavy rains or snowmelt. Make sure the pump runs smoothly and efficiently removes water from the pit. Clean the pump's inlet screen and check valve annually to prevent clogs and backflow.
Test the backup battery system, if installed, by unplugging the main power and filling the pit with water. Replace the battery every two to three years. Inspect the float switch for proper movement and adjust if necessary.
During dry seasons, pour water into the pit monthly to check pump functionality and prevent the impeller from seizing. Keep the pit cover secure and free of debris. If you notice any issues with your sump pump's performance, address them promptly to maintain reliable basement flood protection.