
How to Install a Catch Basin for Better Yard Drainage
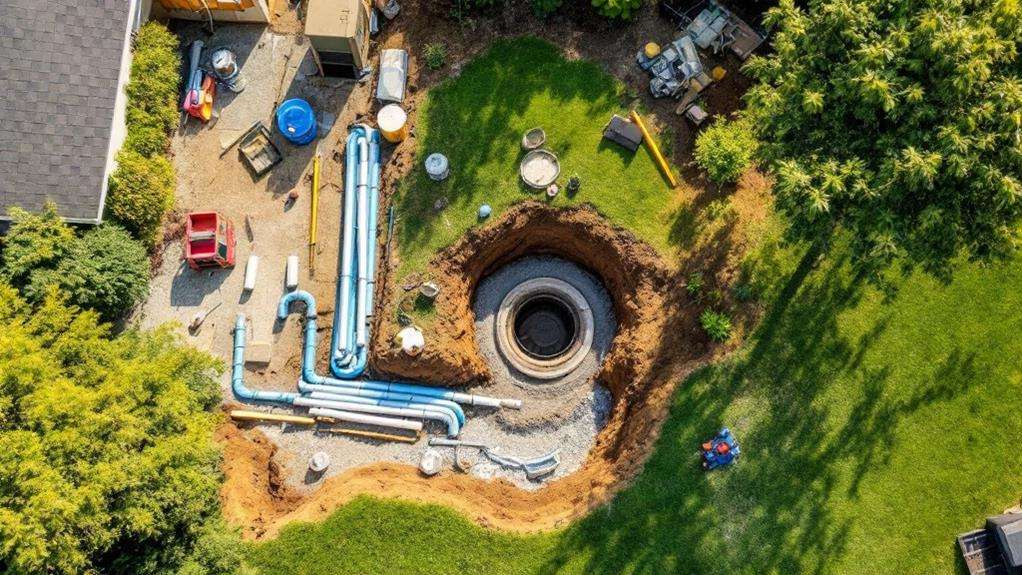
To install a catch basin for better yard drainage, start by planning the installation and gathering necessary tools and materials. You'll need to dig a hole at the lowest point in your yard, ensuring proper depth and a level bottom. Connect drainage pipes with a slight downward slope, using PVC primer and cement for watertight joints. Set the catch basin in place, making sure it's level and slightly lower than the surrounding ground. Backfill around the basin and pipes with gravel, then add topsoil and grass seed to blend with your lawn. Regular maintenance will keep your new drainage system functioning ideally. Proper installation techniques can make a significant difference in your yard's water management.
Planning Your Catch Basin Installation
Preparation is key when planning your catch basin installation. Before you begin, conduct a thorough soil moisture analysis to determine the areas of your yard that retain the most water. This will help you identify the ideal location for your catch basin. Observe water flow patterns during rainy periods to understand how water moves across your property. This information is essential for positioning the basin and planning drainage routes.
Next, check local building codes and obtain any necessary permits. You'll need to consider underground utilities, so call your local utility companies to mark their lines before digging. Measure and map out the area where you'll install the catch basin and its connecting pipes. Choose a basin size that can handle the expected water volume in your area.
Gather all required materials and tools before starting. You'll need the catch basin, grates, PVC pipes, gravel, and appropriate digging tools. Plan for proper slope in your drainage pipes to ensure efficient water flow. Consult a professional for complex installations or if you're unsure about any aspect of the project.
Necessary Tools and Materials
A successful catch basin installation requires the right tools and materials at your disposal. Before you begin, it's indispensable to gather everything you'll need while estimating material quantities accurately. You'll want to avoid multiple trips to the hardware store, so create an extensive list.
For tools, you'll need:
- A shovel and pickaxe for digging
- A level to verify proper slope
- A tamper to compact the soil
Necessary materials include the catch basin itself, PVC pipes, gravel, and a grate cover. Don't forget to factor in additional items like ground cover, concrete mix, and sealant. When selecting your catch basin, consider the size of your drainage area and expected water flow.
Before purchasing materials, it's fundamental to understand local regulations regarding drainage systems. Some areas may require permits or have specific guidelines for catch basin installations. You might need to adjust your material choices to comply with these rules.
Digging the Basin Hole
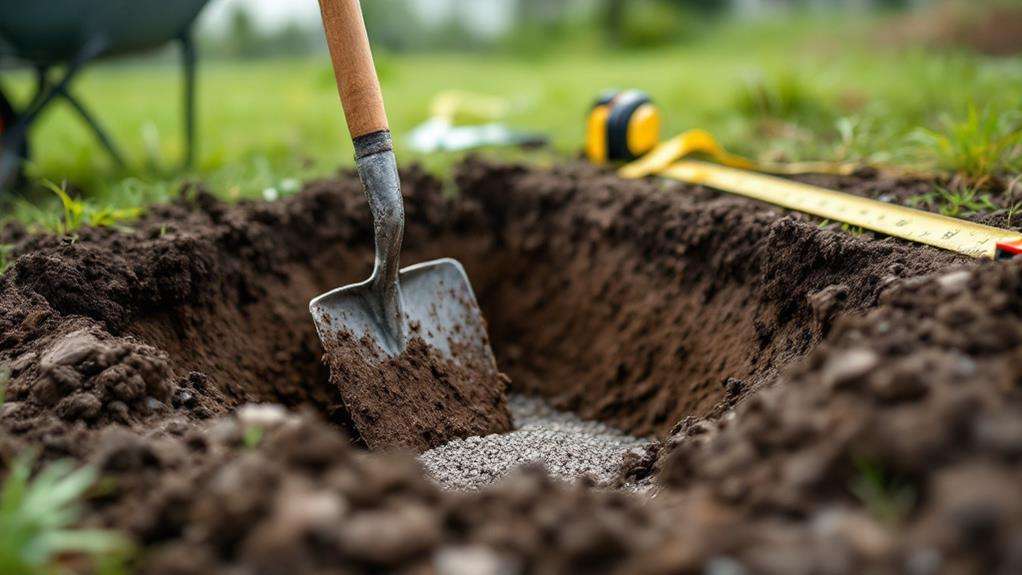
Digging the hole for your catch basin is potentially the most labor-intensive part of the installation process. Begin by marking the area where you'll place the basin, ensuring it's at the lowest point of your yard. Use spray paint or stakes to outline the dimensions, adding an extra 6 inches on each side for workspace.
Start excavating the soil, removing it in layers. As you dig, maintain a level bottom and straight sides. The depth of your hole should accommodate the height of your catch basin plus an additional 4 inches for gravel bedding. Be mindful of the local water table; if you hit saturated soil, you may need to adjust your plans or consult a professional.
Use a measuring tape to check the hole's dimensions frequently as you dig. If you encounter large rocks or tree roots, remove them carefully to avoid damaging your tools or compromising the basin's placement. Once you've reached the desired depth, use a hand trowel to smooth out the bottom and sides. Finally, compact the soil at the base of the hole to create a stable foundation for your catch basin.
Connecting Drainage Pipes
Pipe connections form the backbone of your drainage system. To guarantee proper water flow, you'll need to connect your catch basin to drainage pipes that lead away from your property. Start by measuring and cutting your pipes to the appropriate lengths, considering the distance to the outlet and any necessary turns.
When connecting the pipes, pay close attention to the pipe angle. A slight downward slope of about 1/8 inch per foot will help maintain efficient water flow. Use PVC primer and cement to secure the joints, ensuring a watertight seal.
To properly connect your drainage pipes:
- Attach the first pipe section to the catch basin's outlet, using a compatible fitting.
- Connect subsequent pipe sections, maintaining the correct angle and slope.
- Install clean-outs at key points for future maintenance access.
As you work, periodically check the pipe angle with a level to maintain the proper slope. If you encounter obstacles like tree roots or underground utilities, adjust your pipe route accordingly. Remember to backfill around the pipes with gravel to promote drainage and prevent settling. With careful attention to pipe connections and water flow, you'll create an effective drainage system that protects your yard from excess water.
Setting the Catch Basin
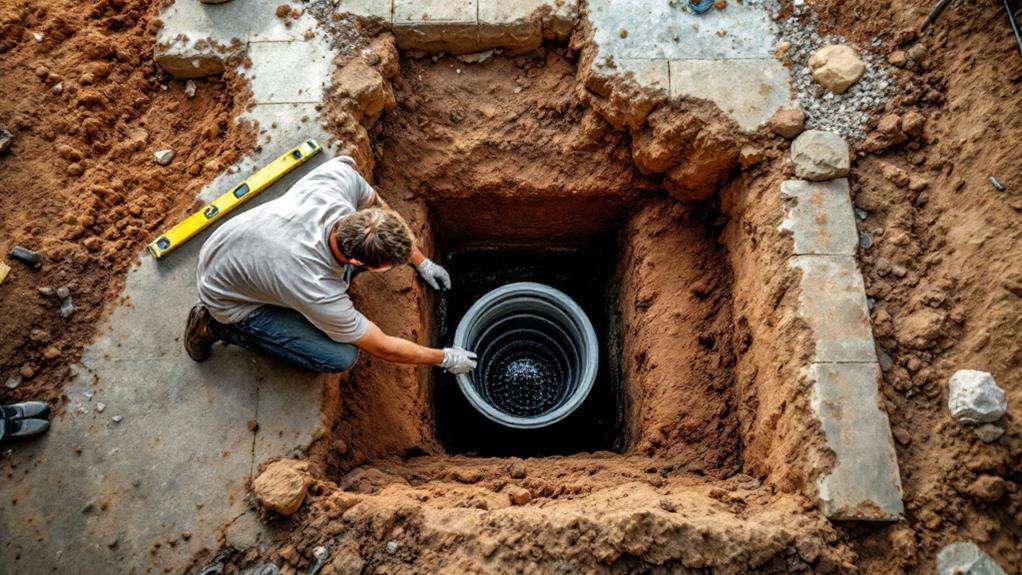
Secure the catch basin in its designated location to guarantee proper water collection and drainage. When setting the catch basin, pay close attention to basin placement and elevation. Verify it's positioned at the lowest point of your yard or the area you're draining. This will allow water to flow naturally towards the basin.
Use a level to check that the catch basin is perfectly horizontal. If it's tilted, water won't drain efficiently. Adjust the basin's height so that it's slightly lower than the surrounding ground. This will help prevent water from pooling around the edges.
Once you've determined the correct placement and elevation, backfill around the basin with gravel or crushed stone. This will provide stability and improve drainage. Tamp down the material as you go to prevent settling later on. Leave about an inch of space between the top of the basin and the finished grade of your yard.
Backfilling and Finishing Touches
With the catch basin securely in place, it's time to complete the installation process. Begin backfilling around the catch basin, using the excavated soil or gravel. As you fill, tamp down the material to guarantee proper compaction and stability. Pay close attention to maintaining proper grading around the basin, sloping the ground slightly towards it to encourage water flow.
Once you've filled to within a few inches of the surface, it's essential to check that the catch basin remains level. Use a level tool to confirm its position and make any necessary adjustments. Then, continue backfilling until you reach ground level.
To finish the installation, follow these steps:
- Add a layer of topsoil around the catch basin
- Compact the soil gently to create a smooth change
- Plant grass seed or lay sod to blend the area with your lawn
Remember to maintain level ground around the catch basin to prevent water from pooling in unwanted areas. Regularly inspect and clean the basin to ensure ideal performance. With these finishing touches, your new catch basin will effectively manage yard drainage and protect your property from water damage.