
DIY Guide: Installing an Under-Sink Water Filtration System
Installing an under-sink water filtration system is a straightforward DIY project that can improve your water quality and taste. You'll need basic tools like an adjustable wrench, screwdriver, and plumber's tape. Start by shutting off the cold water supply and disconnecting the existing line. Mount the filter housing, attach the T-adapter to the cold water line, and connect the inlet and outlet tubing. Insert the filter cartridge and install the dedicated faucet for filtered water. Test for leaks and check water quality before and after filtering. Regular maintenance includes replacing cartridges every 6-12 months. With proper planning and execution, you'll enjoy cleaner water in no time.
Understanding Under-Sink Water Filters
Exploring under-sink water filters reveals a world of convenient and effective water purification options for your home. These filters are directly plumbed into your cold water line beneath the kitchen sink, providing easy access to clean drinking water. You'll find that under-sink filtration systems often come with a dedicated faucet, keeping your filtered water separate from the water you use for cleaning and other tasks.
When choosing a filter system, you'll encounter various types, including activated carbon, KDF, ion exchange, and reverse osmosis. Single-stage filters target specific contaminants, while multi-stage filters address a wider range of water quality issues. If you're looking for the most thorough filtration, consider a reverse osmosis system, which can remove up to 99% of dissolved solids and minerals.
Installing an under-sink water filter typically requires a wrench and some basic plumbing skills. You'll need to connect the filter to your cold water line and install the dedicated faucet. By understanding the different types of filters and their capabilities, you can select the best system for your specific water quality needs and enjoy clean, filtered water straight from your sink.
Selecting the Right Filtration System
The decision to select the right filtration system hinges on understanding your specific water quality needs and budget constraints. When you're ready to install an under-sink water filter, you'll need to choose between single-stage, multi-stage, and reverse osmosis systems.
If you're targeting a specific contaminant and have a limited budget, a single-stage filter might be your best bet. These filters often use activated carbon to address issues like chlorine taste and odor. For more extensive filtration, consider a multi-stage system that tackles multiple water quality problems simultaneously.
For the highest level of purification, reverse osmosis systems are hard to beat. They'll eliminate up to 99% of dissolved solids and contaminants, but they're typically more pricey and intricate to install. Keep in mind that reverse osmosis filters often come with a dedicated faucet for accessing the filtered water.
When you install a water filter, you'll need to connect it to your cold water supply line and secure the filter under your sink. Regardless of the system you choose, make sure it's properly sized for your space and water usage needs. Remember, the right filtration system will greatly improve your water quality and provide peace of mind.
Tools and Materials Required
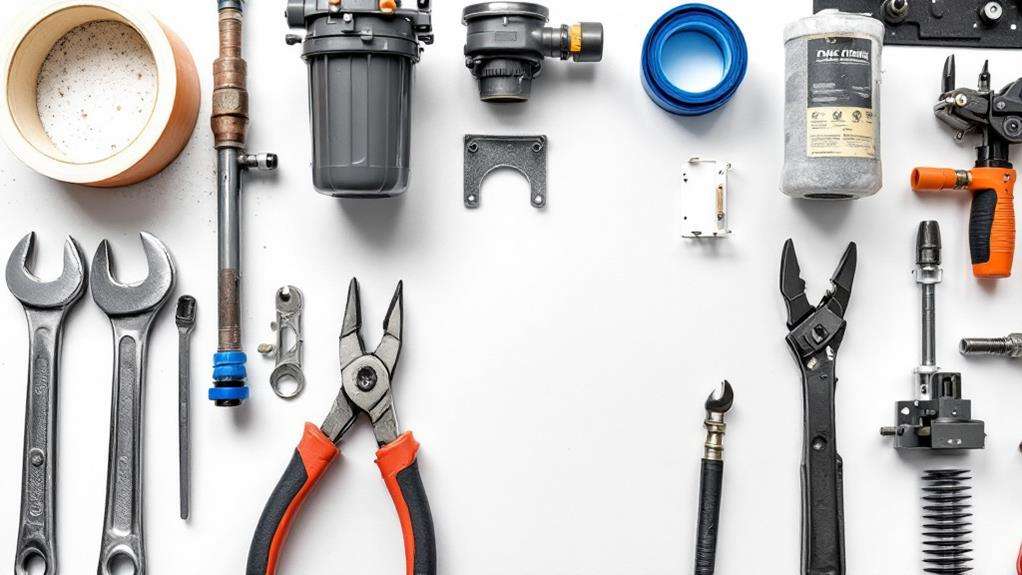
Now that you've chosen the right filtration system, it's time to gather the necessary tools and materials for installation. You'll need an adjustable wrench, a screwdriver, and plumbers tape to handle the connections. Don't forget a bucket or tray to catch any water during the process.
Your under-sink filter kit should include the filter housing, cartridges, and tubing. You'll also need adapters and connectors to attach the system to your cold water supply valve. Clear silicone caulk can be useful for sealing connections and preventing leaks.
Before you begin, guarantee you have all the filter cartridges ready. You'll use plumbers tape on the threaded connections to create a watertight seal. The adjustable wrench will help you tighten fittings and attach the adapter to your existing plumbing.
If your sink doesn't have a dedicated hole for the filtered water faucet, you may need to drill a hole. Once everything's connected, you'll use the shutoff valve to control water flow and check for leaks. With these tools and materials on hand, you'll be well-prepared to install your under-sink filters efficiently and effectively.
Preparing for Installation
Before diving into the installation process, it is necessary to properly prepare your workspace. Start by gathering all the required components for your under-sink water filtration system, including the kit, adjustable wrench, plumber's tape, and a bucket or tray to catch any water. Familiarize yourself with the detailed installation instructions to guarantee you have everything you need and understand the steps involved.
Next, locate the cold water supply line under your sink and clear the area of any obstacles. You'll need easy access to this line, as it's the main connection point for your new carbon filter system. Turn off the cold water supply valve and open the faucet to release any residual pressure in the line. This step is pivotal to prevent water from spraying when you disconnect the line.
Prepare the sink for the new filtered water faucet by checking for available holes or determining if you need to drill a new one. Use an adjustable wrench to loosen any existing connections if necessary. Place a bucket underneath to catch any water that may drip during the installation process. With these preparations complete, you're ready to begin installing your new water filtration system.
Step-by-Step Installation Process
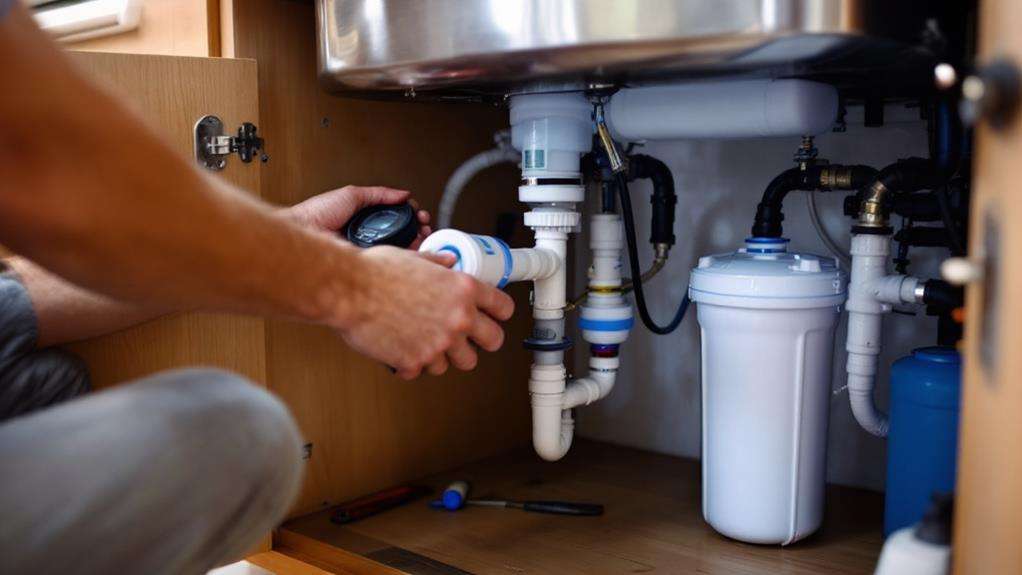
With preparations complete, let's move on to installing your DIY water filtration system. This step-by-step guide will help you achieve clean water in no time. First, mount the filter housing using the provided hardware and mounting bracket. Guarantee it's secure and level for ideal performance.
Next, follow these key steps:
- Install the T-Adapter: Connect it to your cold water supply line, ensuring a tight fit to prevent leaks.
- Attach inlet and outlet tubing: Connect the tubing from the T-Adapter to the filter's inlet, and from the outlet to your new faucet.
- Install the filter cartridge: Insert it into the housing, making sure it's properly seated.
- Connect the faucet: If you've opted for a separate filtered water faucet, install it now and connect it to the filter's outlet tubing.
Once everything's connected, slowly turn on the water supply and check for leaks. Adjust fittings as needed. Run water through the system for a few minutes to flush out any air and activate the filter. You'll notice improved water flow and taste immediately. Congratulations! You've successfully installed your own sink water filter, guaranteeing cleaner, safer drinking water for your household.
Testing and Troubleshooting
Testing and troubleshooting are essential steps in ensuring your DIY water filtration system works effectively. After installation, make sure to test the water quality before and after filtering to confirm that contaminants are flushed out properly. This will help you verify that your system is providing clean and safe water for drinking.
As you run water through the new filter, check for any leaks around the filter housing, tubing connections, and faucet. Place a bucket or tray under the system to catch any potential drips. Monitor the water pressure and flow rate over time, as this can indicate when it's time to replace the filter cartridge.
If you notice reduced water flow, inspect the filter cartridge for clogging or scaling. Replace it if needed to maintain peak performance. Many systems include an adapter that comes with a built-in shut-off valve for hot water lines, which can help prevent damage to the filter.
Should you encounter any issues with your filtration system's operation or components, consult the manufacturer's troubleshooting guide. This resource often provides specific solutions for common problems, ensuring you can quickly resolve any issues and continue enjoying your DIY water filtration system.
Maintenance and Filter Replacement
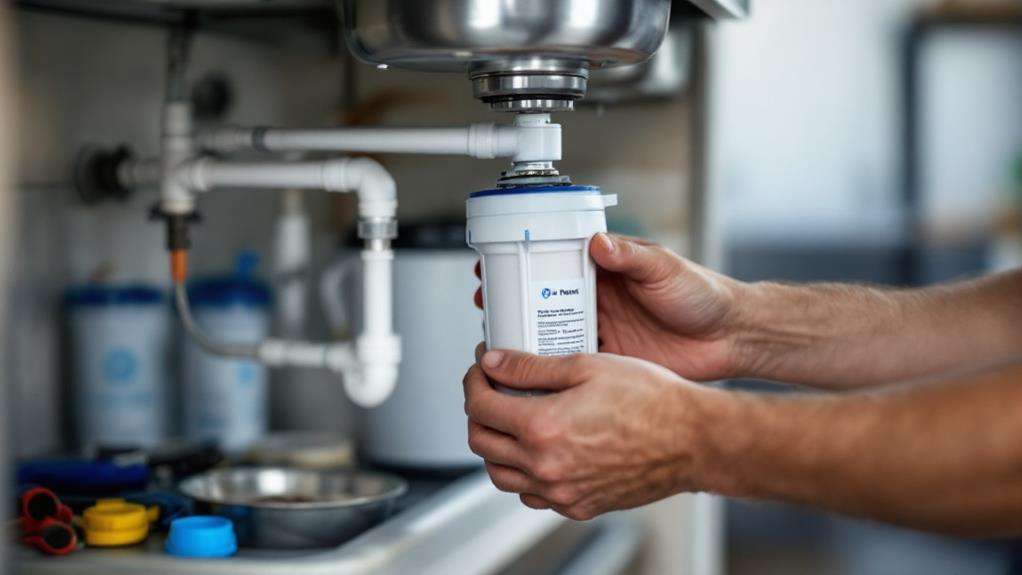
Proper maintenance is essential for the longevity and effectiveness of your DIY water filtration system. Regular upkeep guarantees that your site is protected from contaminants and that you're always enjoying clean, running water. To keep your system in top shape, follow these steps:
- Clean the filter housing periodically to prevent bacterial growth
- Inspect connections regularly and tighten any loose fittings
- Replace filter cartridges every 6-12 months, or as per manufacturer's instructions
- Keep replacement cartridges on hand for immediate replacements
Different types of under-sink filters help remove various contaminants, but they all require proper care. When it's time to replace your filters, close the cold water supply and turn it clockwise to shut off the flow. Some models feature built-in indicators to signal when it's time for a replacement, making maintenance easier.